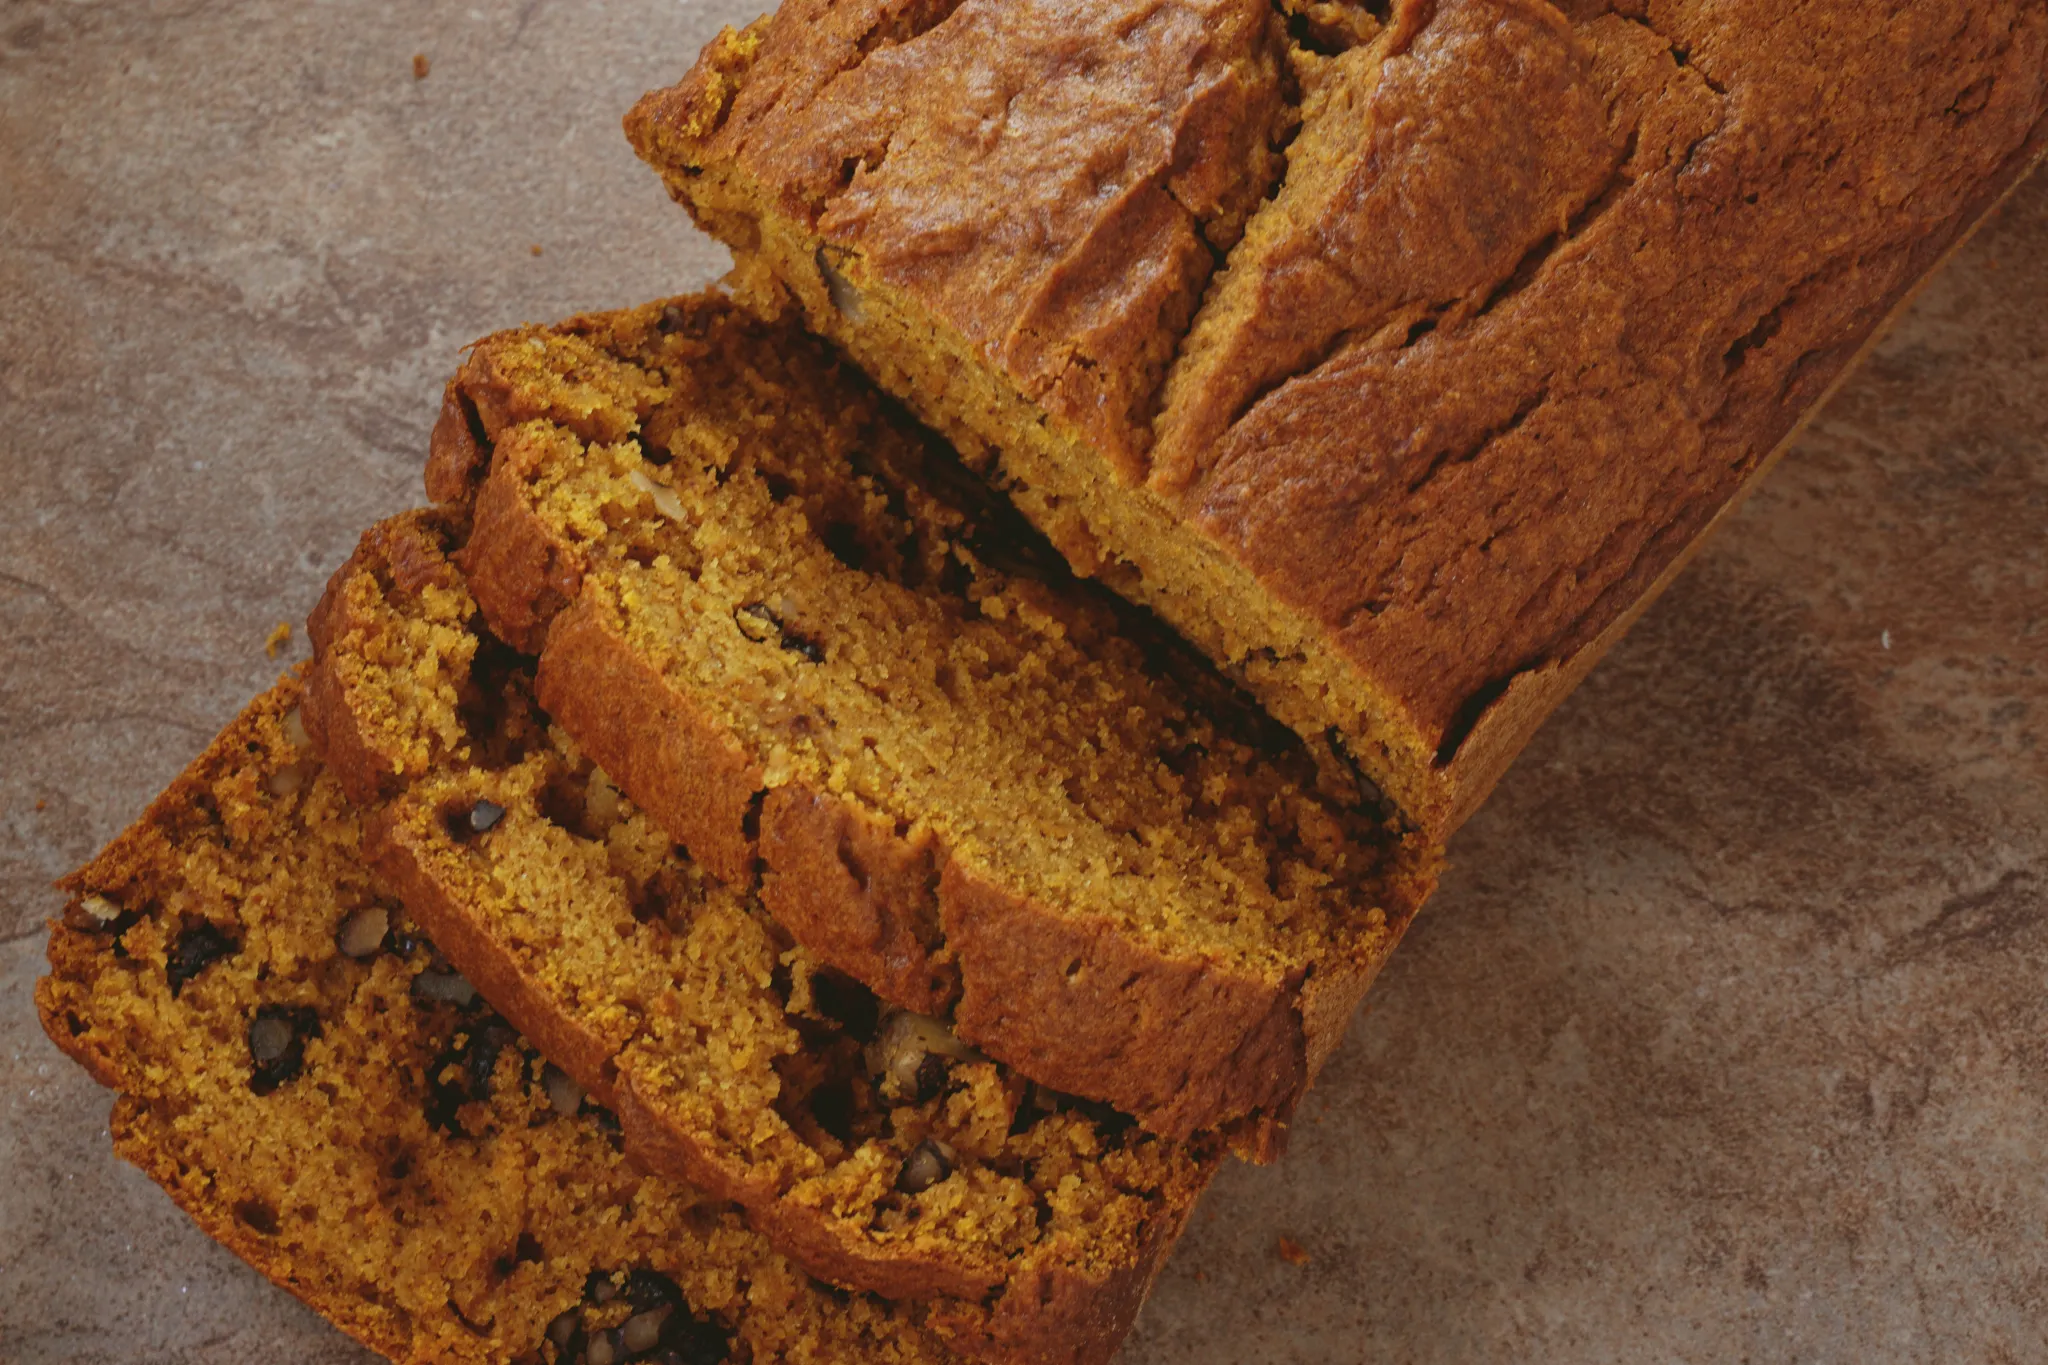
Are you craving a delicious homemade treat that’s both comforting and satisfying? Look no further than this mouthwatering banana bread recipe! Packed with the goodness of ripe bananas and the added crunch of walnuts, this recipe is sure to become a family favorite. Whether you’re a seasoned baker or just starting out, you’ll find that this recipe is easy to follow and yields a moist and flavorful loaf every time. So grab your mixing bowl and let’s get baking!
There’s something truly magical about the aroma of freshly baked banana bread wafting through your kitchen. With just 2 ripe bananas, you can transform them into a delightful loaf that will have everyone asking for seconds. The addition of walnuts adds a delightful crunch and nutty flavor that complements the sweetness of the bananas perfectly. Whether you enjoy it as a breakfast treat or an afternoon snack, this banana bread is sure to satisfy your cravings.
Gather the Ingredients

Now that you’re ready to embark on your banana bread baking adventure, it’s time to gather all the necessary ingredients. Before you start, make sure you have the following items on hand:
- 2 ripe bananas: The star of the show! Look for bananas that are slightly overripe with lots of brown spots. They will be sweeter and easier to mash.
- 1 3/4 cups all-purpose flour: This will serve as the base for your banana bread.
- 1 teaspoon baking soda: This will help your bread rise and become light and fluffy.
- 1/2 teaspoon salt: A pinch of salt will enhance the flavor of your banana bread.
- 1/2 cup unsalted butter, melted: The melted butter will add moisture to your bread and keep it soft.
- 1 cup granulated sugar: Sweeten your banana bread with a cup of granulated sugar.
- 2 large eggs: Eggs will provide structure and help bind the ingredients together.
- 1 teaspoon vanilla extract: A hint of vanilla will add a delightful aroma to your bread.
- 1/2 cup chopped walnuts: These crunchy nuts will add texture and a nutty flavor to your banana bread.
Make sure to have all these ingredients at your fingertips before you start. It’s important to be prepared so you can smoothly move through the recipe without any interruptions.
Preparing the Bananas
Bananas are a versatile and nutritious fruit that can be enjoyed in many different ways. When it comes to making banana bread, it’s important to use ripe bananas to ensure a sweet and flavorful loaf. In this section, we’ll walk you through the process of preparing the bananas for your delicious homemade banana bread with walnuts.
Step 1: Choosing the Right Bananas
When selecting bananas for your banana bread, look for ones that are fully ripe. This means that the bananas should have a vibrant yellow color with some brown spots on the skin. These brown spots indicate that the bananas are at their peak ripeness, which will result in a sweeter and more flavorful bread.
Step 2: Peeling the Bananas
To prepare the bananas for your banana bread, start by peeling them. Gently hold the banana with one hand and use your other hand to grasp the stem. Pull the stem downwards, and the peel should easily come off. If the bananas are very ripe, the peel may come off in sections, which is completely normal.
Step 3: Mashing the Bananas
Once the bananas are peeled, it’s time to mash them. You can use a fork or a potato masher to do this. Place the peeled bananas in a bowl and use the fork or masher to mash them until they become smooth and creamy. You can leave some small chunks for added texture if you prefer.
Step 4: Measuring the Mashed Bananas

The recipe calls for 2 bananas, so it’s important to measure the mashed bananas accurately. Use a measuring cup to scoop out the mashed bananas and level it off with a knife for an exact measurement. This will ensure that you have the perfect amount of banana flavor in your bread.
Now that you know how to prepare the bananas, you’re one step closer to enjoying a delicious loaf of homemade banana bread with walnuts. Let’s move on to the next step in the recipe – gathering all the necessary ingredients.
Mixing the Wet Ingredients
Now that you’ve gathered all your ingredients, it’s time to start mixing the wet ingredients for your delicious banana bread with walnuts. This step is crucial in creating a moist and flavorful loaf that will leave you craving for more!
To begin, grab a large mixing bowl and add two ripe bananas. Remember, the key to a truly amazing banana bread lies in using bananas that are perfectly ripe. Their natural sweetness and soft texture will infuse the bread with incredible flavor.
Next, mash the bananas until they are smooth and creamy. You can use a fork or a potato masher for this step. Make sure there are no lumps remaining, as you want the bananas to incorporate evenly into the batter.
Once the bananas are mashed, it’s time to add the other wet ingredients. Crack two large eggs into the bowl, followed by 1/2 cup of melted butter. The eggs will add moisture and richness to your banana bread, while the butter will ensure a tender crumb.

« Delicious and Moist Banana Bread Recipe: Natasha’s Kitchen’s Secret Ingredient for Perfectly Moist and Flavorful Loaf
Discover Delicious and Nutritious Banana Flower Recipes »
To enhance the flavor and texture even more, pour in 1 teaspoon of vanilla extract. The aroma of vanilla will complement the sweet banana flavor perfectly. Lastly, add 3/4 cup of granulated sugar. This will provide the necessary sweetness to balance out the tanginess of the bananas.
Now that all the wet ingredients are in the bowl, it’s time to mix them together. Grab a whisk or a spatula and gently combine the ingredients until they are well incorporated. Be careful not to overmix, as this can result in a dense and tough bread.
Combining the Wet and Dry Ingredients
Now that you have prepared the ripe bananas and measured out the necessary ingredients, it’s time to combine the wet and dry ingredients to create the perfect banana bread batter.
First, let’s talk about the dry ingredients. In a large mixing bowl, you’ll want to whisk together the all-purpose flour, baking soda, and salt. The flour provides the structure for the bread, while the baking soda helps with the rise and the salt enhances the overall flavor. Make sure to whisk these dry ingredients together thoroughly to ensure even distribution.
Next, it’s time to focus on the wet ingredients. In a separate bowl, you’ll want to mash the two ripe bananas until they are smooth and creamy. The bananas not only add sweetness but also contribute to the moistness and flavor of the bread. You can use a fork or a potato masher to mash the bananas, depending on the texture you prefer. Once the bananas are mashed, add in the melted butter, beaten eggs, vanilla extract, and granulated sugar. Gently whisk these wet ingredients together until they are well combined.
It’s time to bring the wet and dry ingredients together. Carefully pour the wet ingredients into the bowl with the dry ingredients. Using a spatula or a wooden spoon, gently fold the ingredients together until just combined. Be careful not to overmix the batter, as this can result in a dense and tough bread. It’s okay if there are a few lumps or streaks of flour remaining – they will disappear as the bread bakes.
At this point, you can add in the chopped walnuts for an extra crunch and nutty flavor. Fold them into the batter gently until evenly distributed throughout.
And that’s it! You have successfully combined the wet and dry ingredients for your delicious banana bread with walnuts. The next step is to transfer the batter into a greased loaf pan and bake it to golden perfection. But before we get to that, let’s move on to the next section and talk about the importance of baking time and temperature.
Adding the Walnuts
Now that you have the perfect batter for your banana bread, it’s time to take it up a notch by adding some delicious walnuts. These crunchy nuts not only add a wonderful texture to the bread but also bring a delightful nutty flavor that pairs perfectly with the sweetness of the bananas. Here’s how you can incorporate walnuts into your banana bread recipe:
- Choose high-quality walnuts: Look for walnuts that are fresh and plump. Avoid any walnuts that have a rancid or bitter smell, as this can negatively impact the taste of your bread.
- Toast the walnuts: Before adding the walnuts to your batter, consider toasting them to enhance their flavor. Simply spread the walnuts on a baking sheet and toast them in a preheated oven at 350°F (175°C) for about 8-10 minutes, or until they become golden brown and fragrant. Once toasted, let them cool before adding them to the batter.
- Chop the walnuts: To ensure an even distribution of walnuts throughout your banana bread, it’s best to chop them into small, bite-sized pieces. You can use a sharp knife or even pulse them a few times in a food processor. Just be careful not to over-process them, as you want to retain some texture.
- Fold the walnuts into the batter: Once you have your chopped walnuts ready, gently fold them into the batter using a spatula or wooden spoon. Be careful not to overmix the batter at this stage, as it can result in a denser bread. The goal is to distribute the walnuts evenly without deflating the batter.
- Sprinkle some walnuts on top: For an extra touch of visual appeal and added crunch, you can also sprinkle some chopped walnuts on top of the batter before baking. This will create a beautiful golden crust with a hint of nuttiness.
Baking the Banana Bread

Now that you have prepared all the ingredients and mixed them together, it’s time to bake your delicious banana bread! This is the exciting part where your kitchen will be filled with the irresistible aroma of freshly baked goodness.
- Preheat the oven: Start by preheating your oven to 350°F (175°C). Preheating is an essential step to ensure that your banana bread bakes evenly and perfectly.
- Prepare the loaf pan: Grease a standard-sized loaf pan with butter or cooking spray. This will prevent the bread from sticking to the pan and make it easier to remove once it’s baked.
- Pour the batter: Carefully pour the banana bread batter into the greased loaf pan. Use a spatula or the back of a spoon to evenly spread the batter in the pan, ensuring that it reaches all the corners.
- Bake to perfection: Place the loaf pan in the preheated oven and let the magic happen. Bake for about 55-60 minutes, or until a toothpick inserted into the center comes out clean. The exact baking time may vary depending on your oven, so keep an eye on it during the last few minutes.
- Cool and enjoy: Once your banana bread is done baking, remove it from the oven and let it cool in the pan for about 10 minutes. Then, carefully transfer it to a wire rack to cool completely. This will help the bread set and maintain its shape.
Pro tip: If you can resist the temptation, try to let the banana bread cool completely before slicing into it. This allows the flavors to develop further and results in a moist and tender texture.
Congratulations! You have successfully baked a delicious banana bread with walnuts using just two ripe bananas. Now, all that’s left to do is slice a piece, savor the aroma, and enjoy every bite. Whether you’re having it for breakfast, as a snack, or as a sweet treat, this homemade banana bread is sure to bring smiles to everyone’s faces.
Let it cool
Once you’ve baked your delicious banana bread, it’s important to let it cool before slicing and enjoying. This step is crucial to ensure that your bread maintains its shape and texture. Here’s why you should let your banana bread cool:
1. Prevents crumbling: When you take the bread out of the oven, it’s still hot and fragile. Allowing it to cool on a wire rack for about 10-15 minutes helps it set and firm up, making it easier to slice without crumbling.

2. Enhances flavor: Cooling allows the flavors of the banana bread to develop fully. As the bread cools, the moisture redistributes, and the flavors meld together, resulting in a more pronounced and balanced taste.
3. Avoids a soggy texture: If you slice the bread while it’s still hot, the steam trapped inside can make the bread soggy. By allowing it to cool completely, you’ll achieve a moist yet firm texture that is perfect for slicing.
To let your banana bread cool properly, follow these steps:
- Once you remove the bread from the oven, place it on a wire rack. Make sure there is enough space around the loaf for air to circulate.
- Let the bread cool on the wire rack for at least 1 hour. This will ensure that the bread is completely cooled to room temperature.
- After an hour, you can gently touch the top of the bread to check if it’s cool enough. If it feels slightly warm, give it a little more time to cool.
Remember, patience is key when it comes to letting your banana bread cool. It may be tempting to slice into it right away, but waiting will result in a better overall experience. So sit back, relax, and let your banana bread cool to perfection.
Conclusion
Now that you have all the information you need, it’s time to put it into action and make your own delicious banana bread with walnuts! Remember, using ripe bananas is key to achieving a sweet and flavorful loaf. Take the time to properly prepare the bananas by peeling, mashing, and measuring them.

When it comes to mixing the wet ingredients, be gentle and avoid overmixing. This will ensure a tender and moist bread. Combine the wet and dry ingredients, folding them together until just combined. This will result in a perfectly textured banana bread.
If you want to add some extra crunch and flavor, don’t forget to include walnuts. Toast them for enhanced taste and chop them into small pieces for even distribution. Fold them into the batter without overmixing and sprinkle some on top for added visual appeal.
Once you’ve poured the batter into a greased loaf pan, it’s time to bake your banana bread to golden perfection. Follow the instructions for preheating the oven, baking time, and cooling before slicing and enjoying your homemade treat.
So go ahead, gather your ingredients, and let the aroma of freshly baked banana bread fill your kitchen. You’ll be rewarded with a delicious and satisfying treat that’s perfect for breakfast, snack time, or any time you crave something sweet. Happy baking!


