Are you in the mood for a delicious and refreshing treat? Look no further than a homemade banana milkshake! Whether you’re craving a sweet snack or a quick breakfast on the go, this classic beverage is sure to hit the spot. In just a few simple steps, you can create a creamy and flavorful drink that will satisfy your taste buds. So, grab your blender and get ready to whip up the perfect banana milkshake!
If you’re a fan of bananas, then you’re in for a real treat with this banana milkshake recipe. Packed with the natural sweetness and creamy texture of ripe bananas, this drink is a true delight. All you need are a few basic ingredients and a blender to create this irresistible treat. Whether you enjoy it as a dessert or a midday pick-me-up, this banana milkshake is sure to become a favorite in your household. Get ready to indulge in a taste of banana bliss!
Ingredients

When it comes to making a delicious banana milkshake, the key is to use ripe bananas that are bursting with flavor. Here are the ingredients you’ll need for this delightful treat:
- Ripe bananas: Bananas are the star of the show in this milkshake. Make sure to choose bananas that are fully ripe, with a vibrant yellow color and a few brown spots. Ripe bananas are not only sweeter but also have a creamier texture, which adds richness to the milkshake.
- Milk: Choose the type of milk that suits your taste and dietary preferences. Whether you prefer whole milk for a creamier consistency or almond milk for a dairy-free option, the choice is yours. Just make sure to use enough milk to achieve the desired thickness of your milkshake.
- Ice cream: For an extra indulgent touch, add a scoop or two of your favorite ice cream flavor. Vanilla ice cream pairs perfectly with the natural sweetness of the bananas and adds a velvety smoothness to the milkshake.
- Sweetener (optional): If you prefer your milkshake to be a bit sweeter, you can add a touch of sweetener. This could be honey, maple syrup, or even a pinch of sugar. However, keep in mind that ripe bananas are already naturally sweet, so you may not need any additional sweetener.
Now that you have gathered all the necessary ingredients, let’s move on to the next step: blending it all together to create a creamy and delicious banana milkshake.
Step 1: Prep the Banana
Bananas are not only delicious, but they are also incredibly versatile. From smoothies to baked goods, this humble fruit can be used in a variety of ways to add flavor and nutrition to your meals. In this section, we will walk you through the first step in making a mouthwatering banana milkshake – prepping the banana.
- Choose ripe bananas: The key to a great banana milkshake is using ripe bananas. Look for bananas that are yellow with brown spots. These bananas are sweeter and have a softer texture, which will give your milkshake a creamy consistency.
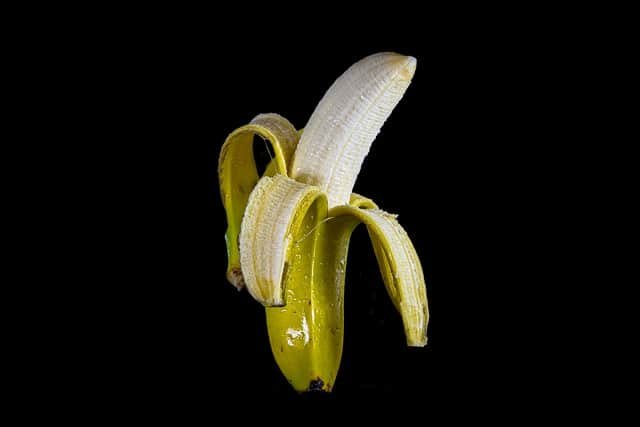
- Peel and slice the bananas: Once you have selected the perfect bananas, it’s time to peel and slice them. Gently peel the bananas, starting from the stem end. If the bananas are very ripe, they may be a little mushy, so be careful when handling them. Once peeled, slice the bananas into small pieces. This will help them blend smoothly and evenly in your milkshake.
- Freeze the banana slices (optional): For an extra chilly and thick milkshake, you can freeze the banana slices before blending. Simply place the sliced bananas in a single layer on a baking sheet lined with parchment paper and freeze for a couple of hours. Once frozen, transfer the banana slices to a resealable bag or container until you’re ready to make your milkshake.
Step 2: Blend the banana
Now that you have prepped your ripe bananas, it’s time to blend them into a smooth and creamy consistency. This step is crucial in creating the perfect banana milkshake.
Grab your blender and add the sliced bananas into the pitcher. If you prefer a thicker milkshake, you can also add some frozen banana slices. The frozen bananas will not only add thickness but also give your milkshake a nice chill.
Next, pour in the milk. You can use any type of milk you prefer – whole milk, almond milk, or even soy milk. Just make sure to use enough to cover the bananas and achieve your desired milkshake consistency.
If you want to take your banana milkshake to the next level of indulgence, you can add a scoop or two of your favorite ice cream. This will give your milkshake a rich and creamy texture, making it even more satisfying.
It’s time to blend everything together. Secure the lid of your blender and start blending on a low speed to break down the bananas. Gradually increase the speed until you reach a smooth and creamy consistency. This should only take a few minutes.
Once your banana milkshake is blended to perfection, give it a taste. If you prefer it sweeter, you can add a touch of sweetener such as honey or maple syrup. Just be mindful not to overpower the natural sweetness of the bananas.
Congratulations! You have successfully blended your bananas into a delicious milkshake. Now it’s time to pour it into a glass, add a straw, and enjoy the creamy and refreshing goodness of your homemade banana milkshake.

Stay tuned for the next step as we add some finishing touches to make your banana milkshake even more delightful.
Step 3: Add milk and sweetener
Now that you have your ripe bananas blended to a smooth consistency, it’s time to take your homemade banana milkshake to the next level. The addition of milk and sweetener will enhance the flavor and make it even more indulgent.
First, pour in your desired amount of milk into the blender. You can use any type of milk you prefer – whether it’s dairy milk, almond milk, or even coconut milk for a tropical twist. The milk will not only add creaminess to the milkshake but also help to achieve the desired consistency.
Next, it’s time to add a touch of sweetness. If you prefer a naturally sweet milkshake, you can skip this step. However, if you have a sweet tooth, adding a sweetener of your choice will elevate the flavor. Options like honey, maple syrup, or a sprinkle of sugar can be used to satisfy your cravings. Start with a small amount and adjust to your taste preferences.
Once you have added the milk and sweetener, it’s time to blend everything together once again. This will ensure that all the ingredients are well combined and create a creamy and delightful milkshake. Blend for a few seconds until you achieve a smooth and velvety texture.
Remember, the amount of milk and sweetener you add can be adjusted according to your personal preference. If you prefer a thicker milkshake, reduce the amount of milk. If you want it sweeter, add a little more sweetener. The beauty of making your own banana milkshake is that you have complete control over the flavors and consistency.

Step 4: Blend again
« How to bake a delicious banana cake without baking powder
Step-by-Step Guide: How to Bake Moist and Golden Banana Bread | Simply Recipes »
Now that you have blended the bananas, milk, ice cream, and sweetener together, it’s time to take it one step further and blend again. This step ensures that all the ingredients are fully incorporated and creates a smooth and velvety texture for your banana milkshake.
Why is blending again necessary? Well, sometimes, even after the initial blend, there may still be small chunks or unevenness in the mixture. By blending again, you ensure that every sip of your milkshake is creamy and delightful. Plus, it helps to break down any remaining ice cream or sweetener that may not have fully dissolved.
To blend again, simply return the lid to your blender and turn it on. Let it run for another 20-30 seconds, or until the mixture looks completely smooth. You can also give it a little taste test to make sure the sweetness and flavor are just right.
Remember, the key to a perfect banana milkshake is achieving the ideal consistency. If you prefer a thicker milkshake, you can add more ice cream or frozen banana slices. On the other hand, if you like a thinner consistency, you can add a little more milk and blend until desired.
Once you’re satisfied with the texture, it’s time to pour your banana milkshake into a glass and enjoy! You can garnish it with a sprinkle of cinnamon, a dollop of whipped cream, or even a few slices of fresh banana on top.
Step 5: Add ice and blend
Now that you have a smooth and creamy base for your banana milkshake, it’s time to take it to the next level by adding some ice. Adding ice will not only help to chill and thicken the milkshake, but it will also give it a refreshing and frosty texture that is perfect for those hot summer days.
To add ice to your milkshake, simply grab a handful of ice cubes and drop them into the blender. The exact amount of ice will depend on your personal preference and the desired consistency of your milkshake. If you like a thicker milkshake, you can add more ice. If you prefer a thinner consistency, you can use less ice.
Once you have added the ice, it’s time to blend everything together one more time. This will ensure that the ice is fully incorporated into the milkshake, creating a smooth and velvety texture. Blend the milkshake on high speed for about 30 seconds or until the ice is completely crushed and mixed in.
After blending, take a moment to check the consistency of your milkshake. If it’s too thick, you can add a little more milk and blend again. If it’s too thin, you can add a few more ice cubes and blend until desired thickness is achieved.

And that’s it! Your delicious and refreshing banana milkshake is now ready to be enjoyed. Pour it into a tall glass, grab a straw, and take a moment to savor the creamy and indulgent flavors of the banana.
Remember, you can always get creative and customize your banana milkshake by adding toppings such as whipped cream, chocolate syrup, or even a sprinkle of cinnamon. The possibilities are endless, so feel free to experiment and make this recipe your own.
Step 6: Serve and Enjoy
Now that you’ve followed the simple steps to make your homemade banana milkshake, it’s time to indulge in this delicious treat! Serving and enjoying your banana milkshake is the final step in this delightful journey.
To serve your banana milkshake, start by pouring it into a tall glass. The creamy texture and vibrant color of the milkshake are an inviting sight. You can even use a fun straw or add a colorful garnish to make it more visually appealing.
Take a moment to appreciate the aroma of the freshly blended bananas. The sweet fragrance will surely awaken your senses and make your mouth water in anticipation.

Next, take a sip of your banana milkshake and let the flavors dance on your taste buds. The natural sweetness of the ripe bananas combined with the creaminess of the milk creates a delightful harmony. The silky smooth texture is incredibly satisfying, making each sip a moment of pure indulgence.
As you continue to enjoy your banana milkshake, take note of the nutritional benefits it offers. Bananas are a great source of potassium, vitamin C, and fiber. They are also known to boost energy levels and support digestion. So not only are you treating yourself to a delicious beverage, but you’re also nourishing your body with wholesome goodness.
Whether you enjoy your banana milkshake as a refreshing snack on a sunny afternoon or as a quick and nutritious breakfast, it’s a delightful way to incorporate bananas into your day.
Remember, the best part about making a homemade banana milkshake is that you can customize it to suit your preferences. You can add a scoop of your favorite ice cream for an extra indulgent treat, or experiment with different sweeteners to enhance the flavor. Feel free to get creative and make it your own!
Conclusion
Now that you have all the steps and tips for making a homemade banana milkshake, it’s time to put your newfound knowledge to use and enjoy this delicious treat. With just a few simple ingredients, you can create a refreshing and indulgent milkshake that can be enjoyed any time of the day.

By using ripe bananas, you’ll experience the natural sweetness and creamy texture that make this milkshake so delightful. Whether you choose to add ice cream or sweetener is up to you, but either way, the end result will be a smooth and velvety concoction that is sure to satisfy your cravings.
Remember, you can always customize your milkshake by adding different toppings or experimenting with different flavors. Whipped cream, chocolate syrup, or a sprinkle of cinnamon can take your milkshake to the next level.
So grab a tall glass, pour in your homemade banana milkshake, and take a moment to appreciate the aroma before diving in. The flavors and creamy texture will surely bring a smile to your face.
Enjoy the nutritional benefits of the bananas as you savor each sip. Cheers to your homemade banana milkshake and the joy it brings!


