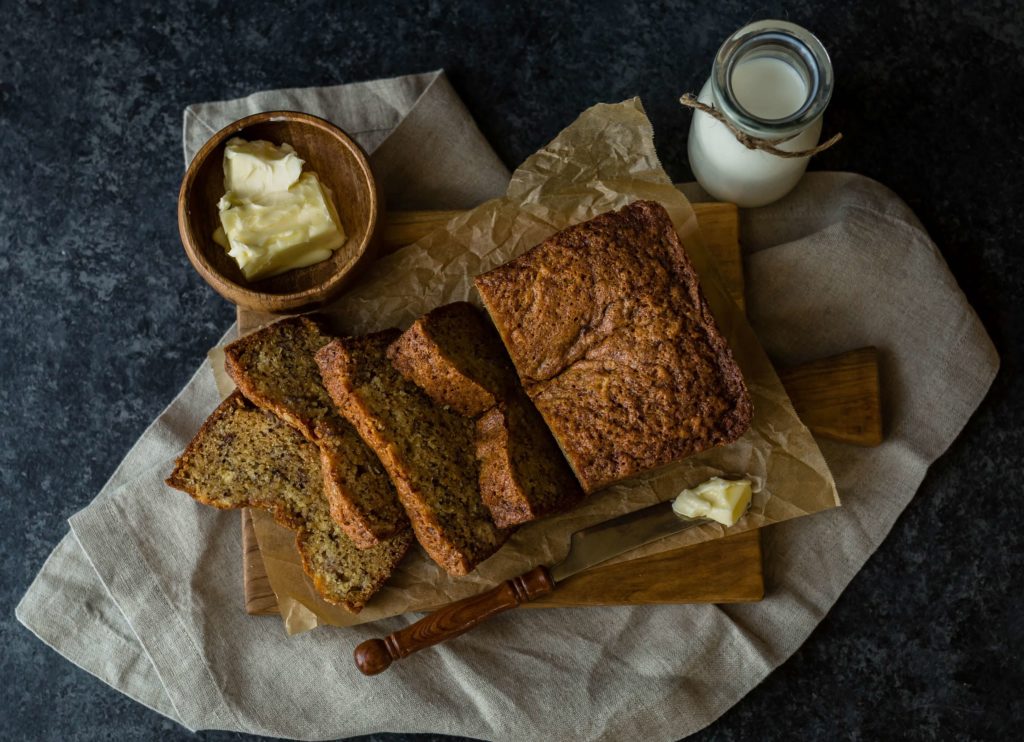
Are you craving a warm and delicious treat? Look no further than this mouthwatering banana bread recipe with self-rising flour. Whether you’re a seasoned baker or just starting out, this recipe is a foolproof way to satisfy your sweet tooth. With just a few simple ingredients and easy-to-follow steps, you’ll have a loaf of moist and flavorful banana bread in no time. Get ready to impress your family and friends with this delectable homemade treat.
Have you ever wondered what to do with those overripe bananas sitting on your countertop? Well, we have the perfect solution for you! This banana bread recipe with self-rising flour is the ultimate way to use up those brown bananas and create a delightful treat. The self-rising flour eliminates the need for additional leavening agents, making this recipe a breeze to whip up. Plus, the combination of ripe bananas and warm spices will fill your kitchen with an irresistible aroma.
What is Self-Rising Flour?

If you’re a baking enthusiast or just someone who loves making delicious treats, you may have come across the term “self-rising flour” in various recipes. But what exactly is self-rising flour and how does it differ from regular all-purpose flour?
Self-rising flour is a type of flour that already contains leavening agents, such as baking powder and salt, in the right proportions. This means that when you use self-rising flour in a recipe, you don’t need to add any additional leavening agents like baking powder or baking soda. It simplifies the baking process and ensures that your baked goods rise properly.
The key ingredient in self-rising flour is baking powder. Baking powder is a combination of baking soda, cream of tartar, and a moisture-absorbing agent. When exposed to moisture and heat, baking powder releases carbon dioxide gas, which creates bubbles and causes the dough or batter to rise.
Using self-rising flour in your banana bread recipe eliminates the need to measure and mix separate leavening agents, making the recipe even easier to follow. It also ensures that your banana bread will have a light and fluffy texture.
But remember, self-rising flour is not a direct substitute for all-purpose flour in every recipe. It is specially formulated with the right amount of leavening agents for certain baked goods, like quick breads, biscuits, and pancakes. If a recipe calls for all-purpose flour and you want to use self-rising flour instead, you’ll need to adjust the amounts of other ingredients, such as salt and baking powder, accordingly.
Now that you know what self-rising flour is and how it works, you can confidently use it in your banana bread recipe to achieve delicious results.
Why Use Self-Rising Flour in Banana Bread?
When it comes to making the perfect banana bread, using self-rising flour can be a game-changer. Wondering why? Well, let me break it down for you.
1. Convenience: One of the biggest advantages of using self-rising flour in your banana bread recipe is the convenience it offers. Self-rising flour already contains the perfect balance of leavening agents, such as baking powder and salt, so you don’t have to worry about adding them separately. This saves you time and effort, making the baking process a breeze.
2. Foolproof Rising: Self-rising flour is specifically formulated to ensure that your banana bread rises evenly and beautifully. The precise proportions of leavening agents in self-rising flour help create just the right amount of lift, resulting in a light and fluffy texture. So, even if you’re a beginner baker, you can confidently whip up a delicious loaf of banana bread without any worries.
3. Consistent Results: With self-rising flour, you can expect consistent and reliable results every time. The carefully measured amounts of baking powder and salt in self-rising flour eliminate the guesswork involved in using separate leavening agents. This means that your banana bread will turn out consistently moist, tender, and perfectly risen, ensuring a delightful treat every time you bake.

4. Versatility: While self-rising flour is a fantastic choice for making banana bread, it’s also a versatile ingredient that can be used in a variety of other baked goods. From biscuits and pancakes to muffins and cakes, self-rising flour can be your go-to flour for all your baking needs. So, it’s definitely worth keeping a bag of self-rising flour in your pantry for those impromptu baking sessions.
Ingredients for Banana Bread with Self-Rising Flour
When it comes to making delicious banana bread, using self-rising flour is a game-changer. It simplifies the baking process and guarantees consistent, foolproof results every time. So, let’s dive into the ingredients you’ll need to whip up a mouthwatering banana bread using self-rising flour.
Here’s what you’ll need:
- Ripe Bananas: The star of the show! Make sure you have a few overripe bananas on hand. They should have a soft texture and be speckled with brown spots. These bananas add natural sweetness and moisture to your bread.
- Self-Rising Flour: This is the secret ingredient that makes your banana bread rise effortlessly. Self-rising flour already contains the perfect balance of leavening agents, such as baking powder and salt. It saves you the hassle of measuring and mixing these ingredients separately.
- Sugar: To enhance the sweetness of your banana bread, you’ll need granulated sugar. It adds a touch of sweetness without overpowering the natural flavor of the bananas.
- Butter: Butter adds richness and moisture to your banana bread. Make sure it’s softened to room temperature, so it mixes easily with the other ingredients.
- Eggs: Eggs act as a binding agent and help to give your bread structure. They also add richness and a light texture to the final product.
- Vanilla Extract: A splash of vanilla extract gives your banana bread a warm, inviting aroma and enhances the overall flavor profile.
- Optional Add-ins: Get creative and add your favorite mix-ins to elevate your banana bread. You can toss in some chopped nuts, like walnuts or pecans, for an extra crunch. Or sprinkle in some chocolate chips for a delightful chocolatey twist.
Now that you have all the ingredients ready, it’s time to roll up your sleeves and get baking! Let’s move on to the next section to learn how to bring these ingredients together and create a delectable banana bread with self-rising flour.
Step-by-step instructions
Now that you have all the ingredients ready, it’s time to dive into the step-by-step process of making your delicious banana bread with self-rising flour. Follow these simple instructions and enjoy the aroma of freshly baked goodness wafting through your kitchen.
- Preheat your oven to 350°F (175°C) and grease a loaf pan with butter or cooking spray. This will ensure that your banana bread doesn’t stick to the pan.
- Mash the ripe bananas in a large mixing bowl using a fork or potato masher until you have a smooth consistency. The riper the bananas, the sweeter and more flavorful your bread will be.
- Add the sugar and butter to the mashed bananas and mix well until the sugar is dissolved and the butter is fully incorporated. This will give your banana bread a moist and tender texture.
- Crack the eggs into the banana mixture and whisk them together until they are fully combined. The eggs will act as a binding agent and help to hold the bread together.
- Stir in the vanilla extract to add a touch of aromatic flavor to your banana bread. This will complement the sweetness of the bananas and give your bread a delightful aroma.
- Gradually add the self-rising flour to the wet ingredients, stirring gently until the flour is fully incorporated. Be careful not to overmix the batter, as this can result in a dense and tough bread.
- If desired, add any optional add-ins such as chopped nuts or chocolate chips to enhance the texture and taste of your banana bread. Fold them into the batter gently.
- Pour the batter into the greased loaf pan, spreading it evenly. This will ensure that your banana bread bakes evenly and has a uniform texture.
- Bake the banana bread in the preheated oven for about 45-55 minutes, or until a toothpick inserted into the center comes out clean. The exact baking time may vary depending on your oven, so keep an eye on it.
- Remove the banana bread from the oven and let it cool in the pan for about 10 minutes. Then, transfer it to a wire rack to cool completely before slicing and serving.
Voila! Your homemade banana bread with self-rising flour is ready to be enjoyed. Whether you savor it for breakfast, serve it as a

Tips for the Perfect Banana Bread with Self-Rising Flour
« Discover the Perfect Banana Smoothie Recipe – No Yogurt Needed
Discover the Best Banana Bread Recipe by Mary Berg: Easy, Moist, and Delicious »
Making banana bread with self-rising flour is a delicious and convenient way to enjoy this classic treat. Here are some tips to ensure your banana bread turns out perfect every time:
- Choose ripe bananas: The key to a flavorful banana bread is using ripe bananas. Look for bananas that are yellow with brown speckles. These bananas are sweeter and will add a rich taste to your bread.
- Measure your ingredients accurately: Baking is a science, so it’s important to measure your ingredients accurately. Use measuring cups and spoons to ensure you add the right amount of self-rising flour, sugar, butter, and other ingredients. This will help your banana bread rise properly and have a balanced flavor.
- Don’t overmix the batter: When combining the ingredients, be careful not to overmix the batter. Overmixing can lead to a dense and tough texture. Mix until the ingredients are just combined, and you’ll have a moist and tender banana bread.
- Add in some extras: While a classic banana bread is delicious on its own, you can take it to the next level by adding in some extras. Consider mixing in chopped nuts, chocolate chips, or even a swirl of Nutella. These additions will add texture and flavor to your banana bread.
- Preheat your oven: Before baking your banana bread, make sure to preheat your oven to the specified temperature. This ensures that your bread bakes evenly and rises properly.
- Check for doneness: To determine if your banana bread is done, insert a toothpick into the center. If it comes out clean or with just a few crumbs attached, your bread is ready. If the toothpick comes out with wet batter, continue baking for a few more minutes and check again.
- Let it cool before slicing: It can be tempting to dive right into your freshly baked banana bread, but it’s important to let it cool before slicing. Allowing the bread to cool completely will help it set and make it easier to slice without crumbling.
By following these tips, you’ll be able to create a perfect banana bread every time using self-rising flour. Enjoy the delightful aroma and taste of homemade banana bread, and share it with friends and family for a truly enjoyable treat.
Variations and Additions
Now that you know the basic recipe for making banana bread with self-rising flour, let’s explore some exciting variations and additions to take your banana bread to the next level. Don’t be afraid to get creative and experiment with different flavors and textures!
1. Nuts and Seeds
Adding nuts or seeds to your banana bread not only enhances the taste but also provides a delightful crunch. Consider incorporating chopped walnuts, pecans, almonds, or even sunflower seeds. Toast them lightly beforehand to bring out their natural flavors.
2. Chocolate Chips or Cocoa Powder
For all the chocolate lovers out there, why not add a touch of decadence to your banana bread? You can either fold in a handful of chocolate chips into the batter or mix in some cocoa powder for a rich and indulgent chocolatey twist.
3. Dried Fruits
Dried fruits like raisins, cranberries, or chopped dates can add a burst of sweetness and chewiness to your banana bread. Soak them in warm water or orange juice before adding them to the batter to ensure they stay moist and plump.
4. Spices
Spices can elevate the flavor profile of your banana bread and give it a warm, comforting aroma. Consider adding a pinch of cinnamon, nutmeg, or ginger to infuse your loaf with a cozy and delicious taste.
5. Citrus Zest
If you’re looking for a refreshing twist, try adding some citrus zest to your banana bread. Lemon or orange zest can bring a tangy and bright flavor to balance out the sweetness of the bananas.
Remember, these are just a few suggestions to get your creative juices flowing. Feel free to mix and match these additions or come up with your own unique combinations. The beauty of baking is that you can tailor your banana bread to suit your taste preferences.
Frequently Asked Questions

You may have some burning questions about making banana bread with self-rising flour. Don’t worry, I’ve got you covered! Here are a few commonly asked questions and their answers to help you on your banana bread baking journey:
Q: Can I use regular flour instead of self-rising flour?
A: While it’s best to use self-rising flour for this recipe, you can make your own by adding 1 1/2 teaspoons of baking powder and 1/2 teaspoon of salt to every cup of all-purpose flour.
Q: Why use self-rising flour for banana bread?
A: Self-rising flour already contains leavening agents (baking powder and salt), which makes your banana bread rise beautifully. It’s convenient and takes the guesswork out of measuring leavening agents separately.
Q: How ripe should the bananas be?
A: The riper the bananas, the sweeter and more flavorful your banana bread will be. Look for bananas with brown spots, which indicate ripeness. If your bananas aren’t quite ripe enough, you can speed up the process by placing them in a brown paper bag overnight.
Q: Can I freeze banana bread?
A: Absolutely! Banana bread freezes wonderfully. Wrap it tightly in plastic wrap or place it in an airtight container before freezing. It can be stored in the freezer for up to three months. To thaw, simply leave it at room temperature for a few hours or overnight.

Q: Can I add nuts or chocolate chips to my banana bread?
A: Absolutely! Adding nuts or chocolate chips is a great way to enhance the texture and flavor of your banana bread. Simply fold them into the batter just before pouring it into the loaf pan.
Q: Can I make banana muffins instead of bread?
A: Definitely! You can use the same recipe to make delicious banana muffins. Just divide the batter evenly among muffin cups and bake for about 20-25 minutes, or until a toothpick inserted into the center comes out clean.
Conclusion
Now that you have all the necessary information and a foolproof recipe, you can confidently whip up a delicious banana bread using self-rising flour. With its convenience and versatility, self-rising flour ensures that your bread will rise perfectly every time. Plus, you can even use the same recipe to make mouthwatering banana muffins!
Remember to use ripe bananas for the best flavor and sweetness. Don’t hesitate to add in your favorite mix-ins, such as nuts or chocolate chips, to take your banana bread to the next level.
Whether you’re a seasoned baker or just starting out, this recipe is sure to impress. So grab those ripe bananas, gather your ingredients, and get ready to enjoy a warm slice of homemade banana bread. Happy baking!


