Are you craving a delicious and moist banana bread, but only have frozen bananas on hand? Don’t worry, we’ve got you covered! In this article, we’ll share a fantastic banana bread recipe that specifically uses frozen bananas. Whether you accidentally froze your bananas or simply want to make the most out of your freezer stash, this recipe is perfect for you. Get ready to enjoy a warm slice of homemade goodness!
Banana bread is a classic treat that never fails to delight. But did you know that using frozen bananas can actually enhance the flavor and texture of your bread? In this article, we’ll explore the benefits of using frozen bananas in your banana bread recipe. From the convenience of always having ripe bananas on hand to the intensified sweetness and moisture they bring, you’ll be amazed at what frozen bananas can do for your baking. So grab those frozen bananas from your freezer and let’s get baking!
Ingredients

To make a delicious banana bread with frozen bananas, you’ll need a few simple ingredients. Here’s what you’ll need:
- Frozen bananas: The star ingredient of this recipe! Frozen bananas add a unique flavor and texture to the bread, making it incredibly moist and sweet. Plus, using frozen bananas means you can always have ripe bananas on hand, even if you don’t get to them right away.
- All-purpose flour: This provides the structure for the bread and helps it rise.
- Baking soda: A leavening agent that helps the bread to rise and gives it a light, fluffy texture.
- Salt: Just a pinch of salt helps to balance out the sweetness and enhances the overall flavor.
- Unsalted butter: Adds richness and moisture to the bread.
- Granulated sugar: Sweetens the bread and helps to create a beautiful golden crust.
- Eggs: These bind the ingredients together and provide structure.
- Vanilla extract: Adds a hint of warmth and enhances the flavor of the bananas.
- Chopped nuts (optional): If you like a bit of crunch in your banana bread, you can add your favorite nuts like walnuts or pecans.
Now that you have all the ingredients ready, it’s time to move on to the next step – the instructions.
Step 1: Thawing the Frozen Banana
Now that you have a stash of frozen bananas ready to use for your banana bread, the first step is to thaw them. Thawing the bananas is essential to ensure that they blend smoothly into the batter and contribute to the moist and delicious texture of the bread.
Thawing frozen bananas is a breeze. Here’s how you can do it:
- Take the frozen bananas out of the freezer and let them sit at room temperature for about 30 minutes to an hour. This will allow them to soften and become easier to work with.
- Once the bananas have thawed slightly, you can use a fork to mash them. Mash them until they are smooth and there are no large chunks remaining. The mashed bananas will mix more easily into the batter, distributing their flavor and moisture evenly.
Thawing the frozen bananas is a crucial step because it helps to unlock the full potential of their flavor. As the bananas thaw, their natural sugars become more pronounced, adding a delightful sweetness to your banana bread. The softened bananas also contribute to the bread’s moistness, making it incredibly tender and irresistible.
Using thawed frozen bananas not only enhances the taste and texture of your banana bread, but it also provides a convenient solution for using up overripe bananas. Instead of tossing them in the trash, you can freeze them and have them on hand whenever a craving for banana bread strikes.
Step 2: Mashing the Banana
Now that you have thawed your frozen bananas to perfection, it’s time to move on to the next step: mashing them. This step is crucial in unlocking the full potential of the bananas’ flavor and texture.
Mashing the bananas is a simple yet important task. You want to make sure that the bananas are well-mashed to achieve a smooth and creamy consistency in your banana bread batter. This will ensure that every bite of your bread is filled with the sweet and moist goodness of the bananas.
There are a few different methods you can use to mash your bananas. You can use a fork and mash them by hand, which gives you more control over the texture. Alternatively, you can use a potato masher or even a blender if you prefer a smoother consistency.
When mashing the bananas, be sure to remove any stringy fibers that may be present. These fibers can affect the texture of your bread and make it less enjoyable to eat. So take a moment to remove them before mashing.

Remember, the more ripe your bananas are, the easier they will be to mash. So if your bananas are super ripe and soft, they will practically melt in your hands as you mash them. This will result in a smoother and more flavorful banana bread.
Once your bananas are well-mashed, it’s time to incorporate them into the rest of the ingredients. The mashed bananas will add a natural sweetness and moistness to the bread, making it incredibly tender and irresistible.
Step 3: Mixing the Dry Ingredients
Now that you have your thawed and mashed bananas ready, it’s time to move on to the next step in creating your delicious banana bread. In this step, we will focus on mixing the dry ingredients that will give your bread its structure and texture.
To begin, gather the following dry ingredients:
- 2 cups of all-purpose flour: This is the base of your bread and provides the structure and stability needed for a perfect loaf.
- 1 teaspoon of baking soda: This ingredient helps the bread rise and gives it a light and airy texture.
- 1/2 teaspoon of salt: Salt may seem like a small addition, but it plays a crucial role in enhancing the flavors of the other ingredients and balancing the sweetness of the bananas.
Once you have all your ingredients ready, it’s time to mix them together. In a large bowl, whisk together the all-purpose flour, baking soda, and salt. Make sure to incorporate all the ingredients evenly, ensuring that there are no lumps or clumps.
Pro tip: If you want to add some extra crunch and flavor to your banana bread, you can also include a handful of chopped nuts at this stage. Walnuts or pecans work particularly well and add a delightful texture to each bite.

« Learn How to Make Ina Garten’s Mouthwatering Banana Bread Recipe
Delicious and Nutritious Banana Flapjacks: A Step-by-Step Recipe Guide »
Now that your dry ingredients are well-mixed, it’s time to move on to the next step in our banana bread adventure. Stay tuned for Step 4, where we’ll dive into combining the wet ingredients and bringing everything together for a mouthwatering loaf of banana bread.
Step 4: Combining the Wet Ingredients
Now that you have prepared the dry ingredients, it’s time to move on to the wet ingredients. This step is crucial as it will determine the moistness and flavor of your banana bread.
First and foremost, let’s talk about the star ingredient – the thawed frozen bananas. These bananas are the secret to achieving that irresistible sweetness and moistness in your bread. The process of thawing the bananas is important as it allows the fruit to release its natural sugars and become softer. Simply leave the frozen bananas at room temperature for about 30 minutes or until they are completely thawed.
Once the bananas are thawed, it’s time to mash them. There are a few ways you can do this. One method is to use a fork and mash the bananas in a bowl until they are smooth and creamy. Another option is to use a potato masher or a blender for a quicker and more consistent result. Whichever method you choose, make sure to remove any stringy fibers that may be present in the bananas as they can affect the texture of the bread.
Now that you have your mashed bananas ready, it’s time to add the other wet ingredients. In a separate bowl, combine the mashed bananas, melted unsalted butter, granulated sugar, eggs, and vanilla extract. Mix everything together until well combined. The mashed bananas will not only add natural sweetness and moistness to the bread but also contribute to its tender texture.
Remember, the key to a successful banana bread is to make sure all the wet ingredients are well incorporated. This will ensure that every slice of your bread is packed with delicious banana flavor and moistness.
Step 5: Adding the Mashed Banana
Now that you have prepared the dry ingredients and combined the wet ingredients, it’s time to add the star of the show – the mashed bananas! This step is crucial in unlocking the full flavor and texture potential of your banana bread.
When it comes to mashing the bananas, there are a few different methods you can choose from. One option is to use a fork and mash them in a bowl until they are smooth and creamy. Another method is to use a potato masher or a hand blender for a quicker and more efficient process. Whichever method you choose, make sure to remove any stringy fibers that may be present in the bananas before mashing. This will ensure a smooth and enjoyable texture in your bread.
As you add the mashed bananas to the mix, you’ll immediately notice the natural sweetness and moistness they bring to the batter. The bananas act as a natural sweetener, reducing the amount of additional sugar needed in the recipe. Their natural sugars also add moisture, resulting in a tender and irresistible final product.

To incorporate the mashed bananas properly, make sure to mix them thoroughly with the other wet ingredients. This will ensure an even distribution of flavor and moisture throughout the batter. You can use a spatula or a whisk to gently fold the wet ingredients together until well combined.
Remember, the mashed bananas are the key ingredient that gives banana bread its distinct taste and texture. Take your time to ensure that they are fully incorporated into the batter, as this will greatly enhance the overall flavor of your bread.
And with that, you’re one step closer to enjoying a delicious homemade banana bread! The next step is to combine the dry and wet ingredients together, so let’s move on to Step 6.
Step 6: Baking the Banana Bread
Now that you’ve prepared all the ingredients and mixed them together, it’s time to bake your delicious banana bread. Get ready to fill your kitchen with the warm and inviting aroma of freshly baked bread!
- Preheat your oven to 350°F (175°C). This will ensure that your banana bread bakes evenly and to perfection.
- Grease your loaf pan with butter or cooking spray. This will prevent the bread from sticking to the pan and make it easier to remove once it’s baked.
- Pour the banana bread batter into the prepared loaf pan, spreading it evenly. Make sure to smooth out the top with a spatula for an even rise.
- Place the loaf pan in the preheated oven and bake for approximately 55 to 60 minutes. The exact baking time may vary depending on your oven, so keep an eye on it starting at the 50-minute mark.
- To check if your banana bread is fully baked, insert a toothpick or a small knife into the center. If it comes out clean or with a few moist crumbs clinging to it, your bread is ready. If it comes out with wet batter, continue baking for a few more minutes and retest.
- Once your banana bread is done baking, remove it from the oven and let it cool in the pan for about 10 minutes. This will allow the bread to set and make it easier to remove from the pan.
- After 10 minutes, carefully transfer the banana bread from the pan to a wire rack to cool completely. This will prevent the bottom of the bread from becoming soggy.
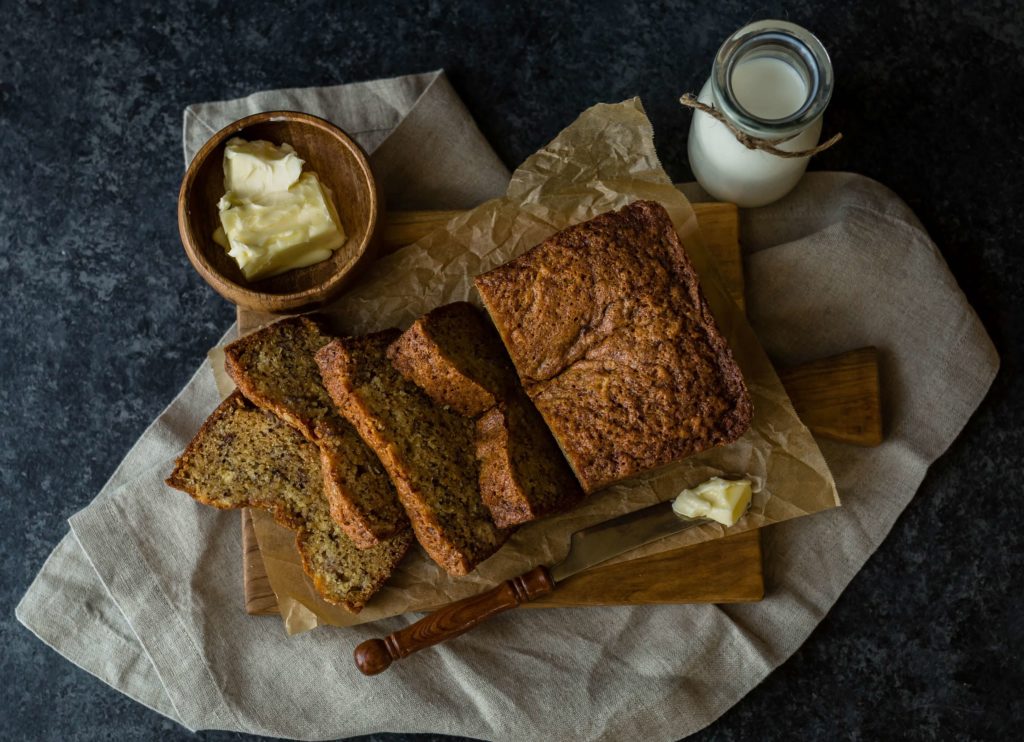
- Once your banana bread has cooled, it’s time to slice and enjoy! You can serve it as is or spread some butter or cream cheese on top for an extra indulgence.
Remember, patience is key when it comes to baking banana bread. Allowing it to cool completely ensures that the flavors and textures have fully developed, resulting in a moist and delicious treat.
Step 7: Cooling and Serving

After patiently waiting for your delicious banana bread to bake to perfection, it’s time to move on to the final step – cooling and serving. This step is essential to ensure that your banana bread is at its best when it reaches your taste buds.
Once you’ve removed the banana bread from the oven, allow it to cool in the loaf pan for about 10 minutes. This will help the bread to set and become more stable. Afterward, transfer the bread to a wire rack to cool completely. This step is crucial because it allows the bread to cool evenly, preventing any excess moisture from getting trapped inside.
Resist the temptation to cut into the bread while it’s still warm. Although it may be tempting to enjoy a warm slice right away, cooling the bread completely will make it easier to slice and enhance its texture. Patience is key here!
Once your banana bread has cooled, it’s time to savor the fruits of your labor. Grab a serrated knife and carefully slice the bread into thick, moist slices. Each bite will be a delightful blend of sweetness, moistness, and the comforting flavors of bananas.
Serve your banana bread as is, or get creative with toppings and spreads. You can enjoy it plain, spread a generous layer of butter on top, or even slather it with cream cheese frosting for an extra indulgent treat. The possibilities are endless!

Remember, banana bread is best enjoyed fresh, so try to consume it within a couple of days. If you have any leftovers, you can wrap them tightly in plastic wrap or store them in an airtight container to keep them moist and fresh.
Now that you’ve mastered the art of making banana bread with frozen bananas, you have a delightful treat that can be enjoyed any time of the day. Whether it’s a quick breakfast on the go, a satisfying snack, or a comforting dessert, your banana bread is sure to bring a smile to your face.
Conclusion
Now that you have all the information and steps needed, you are ready to whip up a delicious banana bread using frozen bananas. By using frozen bananas, you can enhance the flavor and texture of your bread, resulting in a moist and tender final product. Thawing the bananas is crucial as it unlocks their full potential, adding sweetness and moistness to the bread. Remember to mash the bananas thoroughly, removing any stringy fibers, to ensure the best flavor and texture. Mixing the dry ingredients evenly and thoroughly incorporating the wet ingredients are also important steps in creating a delicious and moist banana bread. Once baked, allow the bread to cool completely before slicing and enjoying. Don’t forget to store any leftovers properly to keep them moist and fresh. So go ahead and give this banana bread recipe a try, and enjoy the delightful taste of homemade goodness!


