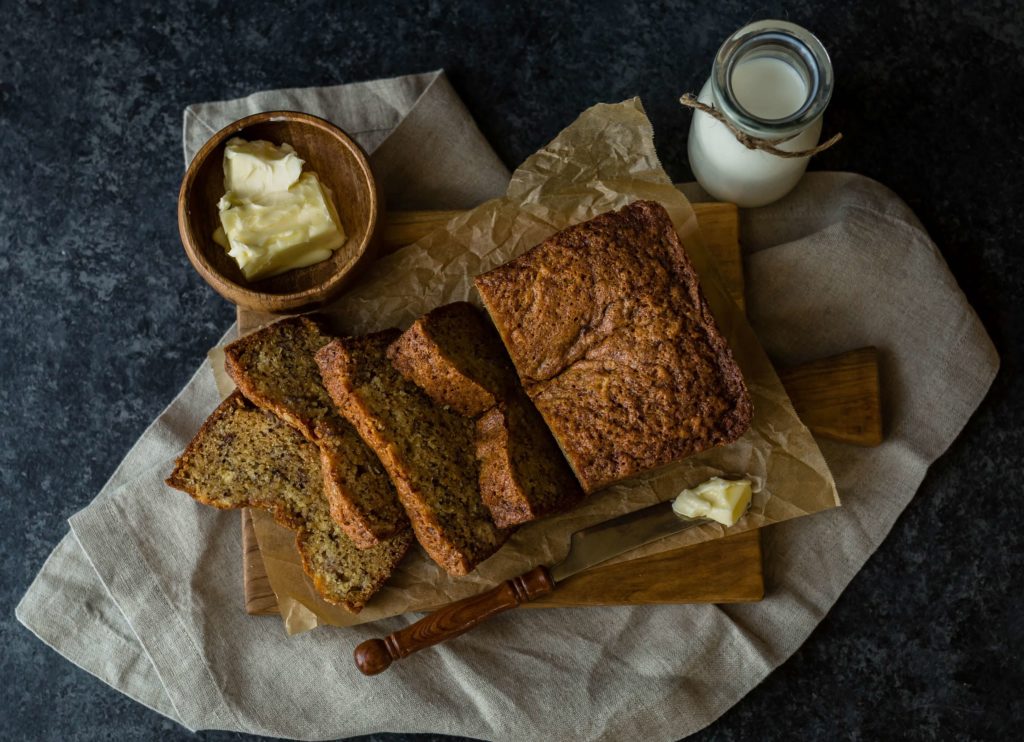
Are you craving a delicious homemade treat but don’t want to spend hours in the kitchen? Look no further! In this article, we’ll share with you an easy recipe for banana bread that uses self-rising flour. With just a few simple ingredients and minimal prep time, you’ll have a moist and flavorful loaf of banana bread in no time. Whether you’re a seasoned baker or a beginner in the kitchen, this recipe is sure to impress your taste buds and leave you wanting more.
Banana bread is a classic comfort food that never fails to satisfy. And with this recipe, you won’t need to worry about measuring out multiple types of flour and leavening agents. By using self-rising flour, you’ll save time and effort without compromising on taste. So grab those overripe bananas sitting on your counter and let’s get baking!
Get ready to fill your home with the warm and inviting aroma of freshly baked banana bread. This recipe is perfect for those lazy weekend mornings or as a tasty treat to enjoy with a cup of coffee or tea. So let’s dive right in and discover how to make this mouthwatering banana bread using self-rising flour.
Benefits of Using Self-Rising Flour in Banana Bread
When it comes to baking banana bread, using self-rising flour can be a game-changer. Here are a few reasons why:
1. Time-saving Convenience: One of the biggest advantages of using self-rising flour is the time it saves you. Unlike traditional flour, self-rising flour already contains the perfect balance of flour, baking powder, and salt. This means you don’t have to spend extra time measuring and mixing these ingredients separately. It’s a simple swap that can significantly speed up your baking process.
2. Foolproof Rising: Self-rising flour is specially formulated with leavening agents, such as baking powder, that help the bread rise evenly. This eliminates the need for additional leavening agents and ensures a consistent rise every time. So even if you’re new to baking or don’t have much experience with yeast-based breads, using self-rising flour takes the guesswork out of achieving that perfect rise.
3. Light and Fluffy Texture: The combination of the right amount of leavening agents in self-rising flour helps create a light and fluffy texture in your banana bread. The result is a moist and tender loaf that is sure to delight your taste buds. Whether you’re enjoying a slice on its own or using it as a base for a delicious banana bread pudding, the texture of your baked goods will be a cut above the rest.
4. Consistent Results: Baking can be a bit of a science, and achieving consistent results can sometimes be a challenge. However, when you use self-rising flour in your banana bread recipe, you can expect consistent results each time you bake. The pre-measured leavening agents in self-rising flour ensure that your bread will rise properly and have the desired texture, making it easier to achieve that perfect loaf every time.
Ingredients for Easy Banana Bread with Self-Rising Flour
If you’re a fan of banana bread but don’t want to spend hours in the kitchen, then this recipe is perfect for you. With the convenience of self-rising flour, you can whip up a delicious loaf of banana bread in no time. Here are the key ingredients you’ll need:
- Ripe Bananas: Make sure to use bananas that are nice and ripe. They should have brown spots on the skin, indicating that they are at their sweetest and most flavorful.
- Self-Rising Flour: This magical ingredient already contains the perfect balance of flour, baking powder, and salt. Using self-rising flour eliminates the need to measure and mix these ingredients separately.
- Sugar: Granulated sugar adds sweetness to the banana bread. You can adjust the amount of sugar based on your preference.
- Butter: Unsalted butter adds richness and moisture to the bread. Make sure to use softened butter for easy mixing.
- Eggs: Eggs act as a binding agent and provide structure to the bread. They also add richness and moisture.
- Vanilla Extract: A splash of vanilla extract enhances the flavor of the banana bread and adds a delightful aroma.
- Optional Mix-ins: You can get creative and add some extra goodies to your banana bread. Popular mix-ins include chocolate chips, chopped nuts, or dried fruits.
These simple ingredients come together to create a moist and flavorful loaf of banana bread. The self-rising flour ensures that the bread rises beautifully, resulting in a light and fluffy texture. Plus, using self-rising flour saves you the hassle of measuring and mixing multiple ingredients.
Now that you have your ingredients ready, it’s time to move on to the next step: the easy and straightforward instructions for making your delicious banana bread.
Step-by-step instructions for making banana bread with self-rising flour
Now that you have all the ingredients ready, let’s dive into the step-by-step process of making this delicious banana bread using self-rising flour. Get ready to enjoy the mouthwatering aroma and irresistible taste of freshly baked banana bread!

1. Preheat your oven to 350°F (175°C) and grease a 9×5 inch loaf pan. This will ensure that your banana bread bakes evenly and doesn’t stick to the pan.
2. Mash the ripe bananas in a mixing bowl until smooth. You can use a fork or a potato masher to do this. The riper the bananas, the sweeter and more flavorful your bread will be.
3. Add the sugar, melted butter, eggs, and vanilla extract to the mashed bananas. Mix everything together until well combined. This will give your banana bread its moist and rich texture.
4. Gradually add the self-rising flour to the banana mixture. Stir gently until just combined. Be careful not to overmix, as this can result in a dense and tough bread.
5. Optional: Add your favorite mix-ins to the batter. You can fold in some chopped nuts, chocolate chips, or dried fruits to add extra flavor and texture to your banana bread. Get creative and experiment with different combinations!
6. Pour the batter into the prepared loaf pan and smooth the top with a spatula. This will ensure a nice even rise while baking.

« Delicious and Nutritious Banana Strawberry Smoothie Recipe with Yogurt
Discover Delicious and Nutritious Raw Banana Recipes »
7. Bake in the preheated oven for about 55-60 minutes, or until a toothpick inserted into the center comes out clean. The baking time may vary, so keep an eye on your bread towards the end to avoid over-baking.
8. Remove the banana bread from the oven and let it cool in the pan for about 10 minutes. Then, transfer it to a wire rack to cool completely before slicing. This will allow the flavors to develop and the bread to firm up.
And there you have it! Your homemade banana bread with self-rising flour is ready to be enjoyed. Whether you savor it on lazy weekend mornings, serve it as a delightful snack, or enjoy it with a cup of coffee or tea, this banana bread is sure to bring a smile to your face.
Remember, the beauty of this recipe lies in its simplicity and the use of self-rising
Tips and Tricks for the Perfect Banana Bread with Self-Rising Flour
Making banana bread with self-rising flour is a simple and convenient way to enjoy this delicious treat. Whether you’re a baking novice or an experienced home cook, these tips and tricks will help you achieve the perfect banana bread every time.
1. Use ripe bananas: The key to a flavorful and moist banana bread is using ripe bananas. Look for bananas that are yellow with brown speckles on the skin. These bananas are fully ripened and will provide a natural sweetness to your bread.
2. Mash the bananas well: Before adding the bananas to the batter, make sure to mash them well. A smooth and creamy banana puree will ensure even distribution of flavor throughout the bread.
3. Gradually add the self-rising flour: When incorporating the self-rising flour into the batter, it’s important to add it gradually. This will prevent overmixing and result in a tender and fluffy texture.
4. Get creative with mix-ins: While banana bread is delicious on its own, you can take it to the next level by adding some mix-ins. Consider adding chopped nuts, chocolate chips, or even a swirl of cinnamon and sugar for an extra burst of flavor.

5. Don’t overbake: Keep a close eye on your banana bread while it’s in the oven. Overbaking can lead to a dry and crumbly texture. To check for doneness, insert a toothpick into the center of the bread. If it comes out clean or with a few moist crumbs, your bread is ready.
6. Let it cool before slicing: It’s tempting to dive right into a freshly baked loaf of banana bread, but it’s important to let it cool completely before slicing. This allows the bread to set and ensures clean and neat slices.
By following these tips and tricks, you’ll be able to create the perfect banana bread with self-rising flour. So grab those ripe bananas, preheat your oven, and get ready to enjoy a slice of warm and delicious homemade banana bread.
Variations and Add-ins for Customized Banana Bread
Now that you have mastered the basic recipe for banana bread using self-rising flour, it’s time to get creative and add your own personal touch to this classic treat. The beauty of banana bread is that it can be customized to suit your taste preferences and dietary needs. Here are a few variations and add-ins that you can try to take your banana bread to the next level:
1. Nuts and Seeds
Adding nuts or seeds to your banana bread not only adds a delightful crunch but also boosts its nutritional value. Walnuts and pecans are classic choices, bringing a rich and buttery flavor to the bread. For a twist, try adding chopped almonds, hazelnuts, or even pistachios. If you prefer a seedier option, consider adding a handful of sunflower seeds, pumpkin seeds, or flaxseeds for added texture and a healthy dose of omega-3 fatty acids.
2. Chocolate and Sweet Delights

For those with a sweet tooth, adding chocolate or other sweet treats to your banana bread is a surefire way to satisfy your cravings. Consider folding in chocolate chips, either semi-sweet or dark, for a decadent treat. You can also experiment with white chocolate chips, butterscotch chips, or even caramel bits for a gooey and indulgent twist. If you’re feeling adventurous, try adding dried fruits like raisins, cranberries, or chopped dates for a burst of natural sweetness.
3. Spices and Flavor Enhancers
To elevate the flavor profile of your banana bread, adding spices and flavor enhancers can make a world of difference. Consider adding a teaspoon of ground cinnamon for a warm and cozy taste. You can also experiment with other spices like nutmeg, cloves, or even a pinch of cardamom for a unique twist. If you’re a fan of citrus flavors, try adding a tablespoon of freshly grated lemon or orange zest to brighten up the bread.
4. Healthy Swaps
If you’re looking to make your banana bread a bit healthier, there are a few swaps you can make without sacrificing taste. Replace some or all of the butter with unsweetened applesauce or mashed avocado for a lower-fat option. You can also use whole wheat flour instead of all-purpose flour to increase the fiber content. Additionally, swapping out some of the sugar with natural sweeteners like honey or maple syrup can reduce
Conclusion
Now that you have all the steps and tips for making banana bread with self-rising flour, you’re ready to create a delicious treat that will impress your family and friends. By following this easy recipe, you can enjoy a moist and flavorful loaf of banana bread in no time.
Using self-rising flour simplifies the baking process, making it even easier to whip up a batch of banana bread. Whether you choose to enjoy it on lazy weekends or pair it with a cup of coffee or tea, this recipe is sure to satisfy your cravings.

Remember to use ripe bananas and mash them well to ensure the best flavor and texture. Gradually adding the self-rising flour will help create a light and fluffy bread. Don’t forget to get creative with mix-ins, such as nuts, chocolate, or spices, to add your own personal touch.
With these tips and variations, you can customize your banana bread to suit your taste preferences and dietary needs. From healthy swaps to indulgent additions, there are endless possibilities to elevate the flavor and nutritional value of your banana bread.
So go ahead, preheat your oven, gather your ingredients, and get ready to enjoy a slice of homemade banana bread made with self-rising flour. Happy baking!


