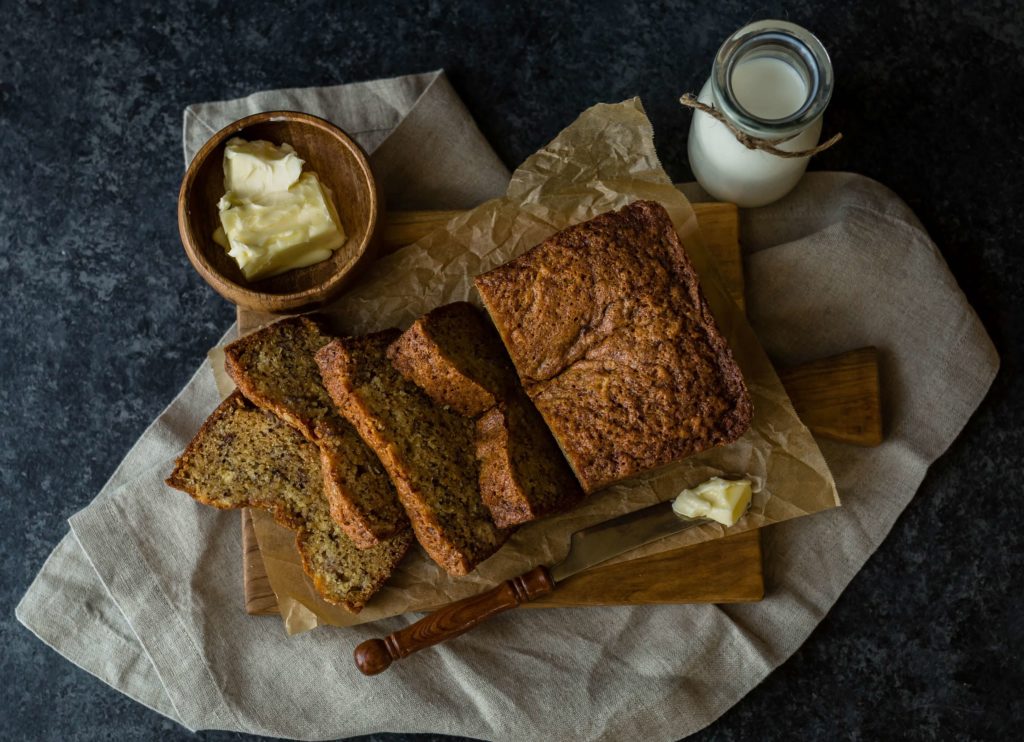
Are you craving a delicious homemade treat? Look no further than this mouthwatering banana bread recipe! With just 3 ripe bananas, you can create a moist and flavorful loaf that will leave you wanting more. Whether you’re a seasoned baker or a beginner in the kitchen, this recipe is perfect for anyone looking to satisfy their sweet tooth. Get ready to enjoy the heavenly aroma of freshly baked banana bread wafting through your home!
If you have a few overripe bananas sitting on your countertop, don’t let them go to waste! This easy banana bread recipe calls for just 3 bananas, making it a great way to use up those browned fruits. Not only does it provide a delicious solution to your banana surplus, but it also delivers a burst of flavor in every bite. From the first slice to the last, you’ll be treated to a moist and tender bread that’s packed with the natural sweetness of ripe bananas.
Gathering Ingredients

Now that you’re ready to make your delicious banana bread, let’s start by gathering all the ingredients you’ll need. Don’t worry, it’s a simple and straightforward process. Here’s what you’ll need:
- 3 ripe bananas: Make sure the bananas are nice and ripe, with brown spots on the skin. Ripe bananas are not only easier to mash but also have a sweeter flavor, which adds to the overall taste of the bread.
- 1/2 cup unsalted butter: Butter adds richness and moisture to the bread. It’s best to use unsalted butter so you can control the amount of salt in the recipe.
- 1 cup granulated sugar: Sugar provides sweetness and helps to caramelize the crust of the bread, giving it a beautiful golden color.
- 2 eggs: Eggs act as a binding agent and add structure to the bread. They also contribute to the moistness of the final product.
- 1 teaspoon vanilla extract: Vanilla extract enhances the flavor of the bananas and adds a subtle sweetness to the bread.
- 1 1/2 cups all-purpose flour: All-purpose flour gives structure to the bread and helps it rise properly. It’s important to measure the flour accurately to ensure the right texture.
- 1 teaspoon baking soda: Baking soda is a leavening agent that helps the bread rise. It also contributes to the light and fluffy texture.
- 1/2 teaspoon salt: Salt enhances the flavors in the bread and balances out the sweetness.
- Optional add-ins: Feel free to get creative and add your favorite mix-ins like chocolate chips, nuts, or dried fruit. These add-ins can take your banana bread to a whole new level of deliciousness!
Preparing the Bananas
If you’re a fan of bananas, you’re in for a treat! In this section, we’ll walk you through the process of preparing the star ingredient for our delicious banana bread recipe. Get ready to unleash the natural sweetness and flavor of these ripe bananas!
Step 1: Gather your ripe bananas
To make the best banana bread, you’ll need 3 ripe bananas. Look for bananas that have a vibrant yellow color with a few brown spots. These spots indicate that the bananas are perfectly ripe and will add a rich sweetness to your bread.
Step 2: Peel and mash the bananas
To start, gently peel the bananas and place them in a mixing bowl. Using a fork or a potato masher, begin mashing the bananas until they reach a smooth consistency. Don’t worry if there are small lumps remaining; they’ll add a delightful texture to your bread.
Step 3: Enhancing the banana flavor (optional)
If you’re a true banana enthusiast and want to intensify the banana flavor in your bread, try this pro tip. Take 1 tablespoon of lemon juice and mix it with the mashed bananas. The acidity from the lemon juice will enhance the natural sweetness of the bananas, giving your bread an extra burst of flavor.
Step 4: Measure the mashed bananas
Once you’ve mashed the bananas, it’s time to measure them. You’ll need 1 1/2 cups of mashed bananas for this recipe. If you have any leftover mashed bananas, don’t worry! You can freeze them in an airtight container and use them for future baking adventures.

By following these simple steps, you’ve successfully prepared the star ingredient for our mouthwatering banana bread recipe. The mashed bananas will add moisture, sweetness, and a delightful banana flavor to every slice. Now, let’s move on to the next step and start creating our delicious banana bread batter.
Mixing the Dry Ingredients
Now that you have prepared the ripe bananas, it’s time to move on to the next step in creating your delicious banana bread. Mixing the dry ingredients is an important part of the process as it helps to ensure that your bread turns out perfectly moist and fluffy.
To begin, gather all the dry ingredients you will need for the recipe. This typically includes all-purpose flour, baking soda, salt, and any additional spices or flavorings you may want to add.
Measure out the appropriate amounts of each ingredient and place them in a large mixing bowl. Using a whisk or a fork, thoroughly combine all the dry ingredients together. This step is crucial in evenly distributing the leavening agents, such as baking soda, throughout the flour to ensure a well-risen loaf.
Once you have mixed the dry ingredients, it’s time to move on to the next step in the banana bread recipe. Don’t worry if the mixture looks a bit lumpy or uneven at this stage. The wet ingredients, including the mashed bananas, will help to bring everything together into a smooth batter.
Remember, do not overmix the batter once the wet and dry ingredients are combined. Overmixing can result in a dense and tough bread. You want to mix just until the ingredients are incorporated.

« The Perfect Recipe for One Ripe Banana
Discover the Endless Possibilities of Incorporating Banana Powder in Your Recipes »
As you mix the dry ingredients, take a moment to appreciate the wonderful aroma of the spices and the anticipation of the mouthwatering banana bread that will soon emerge from the oven.
In the next section, we will explore the next step in the process – combining the wet and dry ingredients to create a luscious banana bread batter.
Combining the Wet and Dry Ingredients
Now that you have prepared the ripe bananas and mixed the dry ingredients, it’s time to bring everything together and create the delicious banana bread batter. This step is crucial in ensuring that your bread turns out moist, fluffy, and full of flavor.
To begin, gather all your wet ingredients. These typically include eggs, melted butter or oil, vanilla extract, and the mashed bananas. Mashed bananas add moisture and natural sweetness to the bread, making it even more irresistible.
In a separate bowl, combine all your dry ingredients, such as flour, sugar, baking powder, baking soda, salt, and any additional spices you desire. Spices like cinnamon and nutmeg add warmth and depth to the flavor of the bread.
Once you have both the wet and dry ingredients ready, it’s time to combine them. Create a well in the center of the dry ingredients and pour the wet ingredients into it. Using a spatula or wooden spoon, gently fold the ingredients together until just combined. Be careful not to overmix the batter, as this can result in a dense and tough bread.
As you mix the batter, take a moment to appreciate the aroma of the spices mingling with the sweet scent of mashed bananas. The anticipation of the final product is part of what makes baking so enjoyable.
Once the wet and dry ingredients are fully combined, you should have a smooth and thick batter. Make sure there are no pockets of dry ingredients in the batter. You want everything to be evenly incorporated for the best texture and flavor.
At this point, your banana bread batter is ready to be poured into a greased loaf pan. Ensure the batter is evenly spread in the pan, and if desired, you can sprinkle some chopped nuts or chocolate chips on top for added texture and indulgence.

Now that you have successfully combined the wet and dry ingredients, it’s time to bake your banana bread to perfection. But before we move on to that step, let’s take a moment to appreciate the simplicity and satisfaction of creating something delicious from just a few ripe bananas.
Adding Extra Flavors
Now that you have mastered the basics of making banana bread with three ripe bananas, it’s time to take it up a notch and add some extra flavors to your delicious creation. By incorporating a few simple ingredients, you can elevate the taste and aroma of your banana bread to a whole new level. Here are some suggestions to get you started:
1. Chocolate Chips
Who can resist the combination of rich chocolate and sweet bananas? Adding a handful of chocolate chips to your banana bread batter will create pockets of gooey goodness in every bite. Whether you prefer dark, milk, or white chocolate, the choice is yours. Just make sure to fold them gently into the batter, so they are evenly distributed.
2. Nuts
For a delightful crunch and added texture, consider adding some chopped nuts to your banana bread. Walnuts, pecans, and almonds work particularly well in this recipe. Before incorporating them into the batter, lightly toast the nuts to enhance their flavor. Then, fold them in gently to ensure they are evenly distributed throughout the bread.
3. Cinnamon and Nutmeg
Warm spices like cinnamon and nutmeg can bring a comforting and cozy element to your banana bread. Add a teaspoon of ground cinnamon and a pinch of nutmeg to the dry ingredients before mixing them into the batter. These aromatic spices will complement the sweetness of the bananas and give your bread a delightful aroma.
4. Coconut Flakes

If you’re a fan of tropical flavors, consider sprinkling some coconut flakes on top of your banana bread before baking. The coconut adds a subtle hint of sweetness and a delightful crunch to each slice. Toast the coconut flakes beforehand to enhance their flavor and texture.
Remember, experimenting with flavors is all about personal preference. Feel free to mix and match different ingredients to create your own signature banana bread masterpiece. Just be sure not to overpower the natural sweetness of the bananas. After all, they are the star of the show!
Now that you have learned how to add extra flavors to your banana bread, it’s time to move on to the next step: baking your creation to perfection. Stay tuned for the upcoming section on baking tips and tricks.
Baking the Banana Bread
Now that you have prepared the banana bread batter, it’s time to bake it to perfection. Follow these steps to ensure a delicious and moist banana bread:
- Preheat the oven: Before you start baking, preheat your oven to 350°F (175°C). By preheating, you ensure that the bread bakes evenly and rises properly.
- Grease the loaf pan: Take a loaf pan and generously grease it with butter or cooking spray. This will prevent the bread from sticking to the pan and make it easier to remove once it’s baked.
- Pour the batter: Pour the banana bread batter into the greased loaf pan. Use a spatula to spread the batter evenly, ensuring that it reaches all corners of the pan.
- Optional toppings: If you want to add some extra flavor and texture to your banana bread, now is the time to do it. Sprinkle some chocolate chips, nuts, or coconut flakes on top of the batter. These additions will create a delightful surprise with every bite.
- Bake the bread: Place the loaf pan in the preheated oven and bake for approximately 50-60 minutes. Keep an eye on the bread as it bakes, and when it turns golden brown and a toothpick inserted into the center comes out clean, it’s ready.
- Cool and enjoy: Once the banana bread is baked, remove it from the oven and let it cool in the pan for about 10 minutes. Then, transfer it to a wire rack to cool completely before slicing. This allows the bread to set and ensures that it maintains its moisture.
Remember, the baking time may vary depending on your oven, so keep an eye on the bread as it bakes. It’s always a good idea to test the bread with a toothpick before removing it from the oven to ensure it’s fully cooked.
Testing for Doneness

Now that you’ve mixed the batter and poured it into the loaf pan, it’s time to bake your banana bread to perfection. But how do you know when it’s done? Don’t worry, I’ve got you covered. In this section, I’ll share some tips on how to test for doneness and ensure your banana bread comes out moist and delicious every time.
1. The Toothpick Test
The most reliable way to check if your banana bread is fully cooked is by using the toothpick test. About 50-60 minutes into baking, insert a toothpick into the center of the bread. If it comes out clean or with just a few moist crumbs clinging to it, your bread is done. If the toothpick comes out with wet batter, it needs more time in the oven.
2. The Finger Press Test
Another way to check for doneness is by gently pressing the top of the bread with your finger. If it springs back and feels firm, it’s likely done. However, if it leaves an indentation or feels soft and squishy, it needs more time to bake.

3. The Internal Temperature Test
For those who prefer a more precise method, you can use a food thermometer to check the internal temperature of your banana bread. It should register around 200°F (93°C) when it’s fully cooked.
Remember, every oven is different, so baking times may vary. Keep a close eye on your banana bread during the last few minutes of baking to avoid overcooking. If the top starts to brown too quickly, you can cover it loosely with aluminum foil to prevent it from burning.
Letting the Bread Cool
Once you’ve baked your delicious banana bread, it’s important to let it cool properly before diving in. This crucial step ensures that the bread sets and becomes easier to slice. In this section, we’ll guide you through the process of cooling your banana bread to perfection.
1. Remove from the oven
Using oven mitts or heat-resistant gloves, carefully take the loaf pan out of the oven. Place it on a heat-safe surface like a wire rack or a cutting board.

2. Allow it to rest
Resist the temptation to slice into the bread immediately. Let it rest in the pan for about 10 to 15 minutes. During this time, the residual heat will continue to cook the bread slightly, making it easier to handle when removing it from the pan.
3. Loosen the edges
After the bread has cooled slightly, run a butter knife around the edges of the loaf to loosen it from the sides of the pan. This will help prevent any sticking and make it easier to remove the bread intact.
4. Gently flip and remove
Place a clean cutting board or a flat plate on top of the loaf pan. Hold the pan and the board/plate together firmly and carefully flip them over. Tap the bottom of the pan to release the bread onto the board/plate. If the bread doesn’t come out easily, you can gently shake the pan or use the butter knife to carefully loosen it further.
5. Let it cool completely
Allow the banana bread to cool completely on the wire rack or cutting board. This can take anywhere from 1 to 2 hours, depending on the temperature of your kitchen. Cooling the bread completely helps it to set and develop its texture and flavors.
6. Optional: Wrap and store
If you’re not planning to devour the entire loaf immediately (which let’s be honest, can be hard to resist), you can wrap the cooled banana bread tightly in plastic wrap or store it in an airtight container. This will help keep it moist and fresh for several days.

Remember, the cooling process is essential for achieving the perfect texture and flavor of your banana bread. So exercise a little patience, resist the urge to cut into it too soon, and savor the anticipation of enjoying a slice of homemade goodness!
Stay tuned for the next section, where we’ll share some helpful tips and tricks to take your banana bread baking skills
Conclusion
Now that you have all the information you need, it’s time to put your baking skills to the test and whip up a delicious banana bread using just 3 ripe bananas! By following the step-by-step guide provided in this article, you’ll be able to create a moist and fluffy bread that is bursting with flavor.
Remember to choose ripe bananas for the best results, and don’t forget to mash them properly to ensure a smooth batter. Taking the time to mix the dry ingredients correctly will also make a big difference in the texture of your bread. And don’t be afraid to get creative with additional flavors like chocolate chips, nuts, or spices to enhance the taste.
Once your batter is ready, follow the baking instructions closely, making sure to test the bread with a toothpick before removing it from the oven. And after it’s done baking, be patient and allow the banana bread to cool completely before slicing into it.

With these tips and tricks, you’ll be able to enjoy a homemade banana bread that is sure to impress your family and friends. So go ahead and get baking, and don’t forget to check out the next section for even more helpful baking advice! Happy baking!


