Are you looking for a delicious and healthy snack option? Look no further than homemade banana chips! In this article, we’ll share an easy and foolproof recipe for making your own crispy and flavorful banana chips. Whether you’re a seasoned chef or a beginner in the kitchen, you’ll be able to whip up these tasty treats in no time. So grab some ripe bananas and let’s get started on this delightful culinary adventure!
Have you ever wondered how to turn those overripe bananas sitting on your counter into a delectable snack? Well, we’ve got the perfect solution for you – banana chips! Not only are they a great way to use up those extra bananas, but they also make for a nutritious and portable snack. In this article, we’ll walk you through a simple recipe for making your own banana chips at home. Get ready to satisfy your cravings with a crispy and wholesome treat!
Why Make Your Own Banana Chips?

Bananas are not only a delicious and versatile fruit, but they also offer a range of health benefits. They are packed with essential nutrients such as potassium, vitamin C, and dietary fiber. While eating a ripe banana is a great way to enjoy these benefits, making your own banana chips takes the goodness of bananas to a whole new level. Here’s why you should consider making your own banana chips:
1. Healthier Alternative to Store-Bought Chips
Many store-bought chips are loaded with unhealthy additives and preservatives. By making your own banana chips, you have full control over the ingredients used. You can choose to bake them instead of deep-frying, which reduces the amount of oil and calories. Additionally, homemade banana chips can be seasoned with natural flavors like cinnamon or cocoa powder, avoiding the excessive salt and artificial flavorings found in packaged snacks.
2. Perfect for Snacking On-the-Go
Banana chips are a convenient and portable snack option. Whether you’re heading to work, going on a hike, or just need a quick energy boost, having a bag of homemade banana chips on hand is a great idea. They are lightweight, easy to pack, and won’t leave you feeling guilty about indulging in a tasty snack.
3. A Versatile Ingredient
Homemade banana chips can be enjoyed in a variety of ways. You can munch on them as is, add them to trail mix for an extra crunch, or use them as a topping for yogurt or oatmeal. They can even be incorporated into baked goods like muffins or cookies for added flavor and texture. The possibilities are endless, allowing you to get creative in the kitchen.
4. Reduce Food Waste
Overripe bananas often get overlooked and end up in the trash. By making banana chips, you can put those ripe bananas to good use and reduce food waste. Instead of tossing them, slice them up and transform them into a delicious and nutritious snack that can be enjoyed by the whole family.
Making your own banana chips is not only a fun and rewarding experience, but it also allows you to enjoy a healthier snack without compromising on taste. So why not give it a try? Grab those ripe bananas, slice them up, and enjoy the crispy goodness of homemade banana chips.
Selecting the Right Bananas
When it comes to making delicious homemade banana chips, selecting the right bananas is key. You want to choose bananas that are overripe, as they will provide the perfect sweetness and flavor for your chips. Here are a few tips to help you select the best bananas for your recipe:
- Look for bananas with brown spots: A banana with brown spots is a good indication that it is ripe and ready to be used for making banana chips. The brown spots indicate that the natural sugars in the banana have started to develop, making them sweeter and more flavorful.
- Avoid green or firm bananas: Green or firm bananas are not ideal for making banana chips. They will not have the same level of sweetness and may not provide the desired flavor. It’s best to wait until the bananas have ripened and developed those brown spots before using them.
- Consider the ripeness level: If you prefer your banana chips to be slightly softer, you can choose bananas that are more ripe and have a softer texture. On the other hand, if you prefer your chips to be crispier, you can opt for bananas that are less ripe and still have a firmer texture.
Remember, selecting the right bananas is the first step in creating delicious homemade banana chips. So next time you’re at the grocery store, keep these tips in mind and choose bananas that are perfectly ripe for your recipe.
Preparation and Slicing
Now that you have selected the perfect bananas for your homemade banana chips, it’s time to move on to the next step: preparation and slicing.
Before you start slicing the bananas, make sure you have all the necessary tools and ingredients ready. Here’s what you’ll need:
- Ripe bananas with brown spots
- A sharp knife
- A cutting board
- Lemon juice (optional)
- Baking sheet
- Parchment paper

Once you have everything you need, follow these simple steps:
- Start by peeling the bananas and discarding the skin.
- Slice the bananas into thin, even rounds. You can choose the thickness according to your preference, but remember that thinner slices will result in crispier chips.
- If you want to prevent the bananas from browning, you can dip the slices into lemon juice. This step is optional but can help maintain the color of the banana chips.
- Preheat your oven to 200°F (93°C). While the oven is preheating, line a baking sheet with parchment paper.
- Arrange the banana slices on the baking sheet, making sure they are evenly spaced and not overlapping. This will help them cook evenly and become crispy.
And that’s it! You’re now ready to move on to the next step in the banana chip-making process. Remember, the key to perfectly crispy banana chips is slicing them thinly and evenly. So take your time and ensure each slice is consistent in thickness.
Stay tuned for the next section, where we’ll discuss the important step of seasoning and baking the banana chips to perfection.
Drying Methods
When it comes to making homemade banana chips, there are a few different drying methods you can choose from. Each method has its own advantages and can result in deliciously crispy chips. Let’s explore these methods further:
Oven Drying
One of the most common methods for drying banana chips is using the oven. This method is convenient and doesn’t require any special equipment. Here’s how you can do it:
- Preheat your oven to 200°F (93°C).
- Line a baking sheet with parchment paper or a silicone mat.
- Place the sliced bananas in a single layer on the baking sheet, making sure they don’t overlap.
- Bake the bananas in the preheated oven for 1-2 hours, flipping them halfway through.
- Keep a close eye on the chips towards the end of the drying time to prevent them from burning.
- Once the chips are crispy and golden brown, remove them from the oven and let them cool completely before enjoying.
Dehydrator Drying
If you have a food dehydrator, using it to dry banana chips is a great option. Dehydrators provide consistent heat and airflow, resulting in evenly dried chips. Here’s how you can use a dehydrator:

- Set your dehydrator to 135°F (57°C), or follow the manufacturer’s instructions.
- Place the sliced bananas on the dehydrator trays, ensuring they are not touching.
- Insert the trays into the dehydrator and set the timer for 6-8 hours.
- Check the chips periodically and rotate the trays if necessary.
- Once the chips are dry and crispy, remove them from the dehydrator and let them cool completely.
Sun Drying
« How to Make Healthy Banana Ice Cream with the Ninja Creami
Create a DIY Banana Bag at Home to Keep Bananas Fresh »
If you live in a warm and sunny climate, you can also try sun drying your banana chips. This traditional method may take longer, but it can result in flavorful and naturally sweet chips. Here’s how you can do it:
- Place the sliced bananas on a clean and dry surface, such as a wire rack or bamboo mat.
- Make sure the bananas are spread out and not touching each other.
- Set the rack or mat in a sunny location with good air circulation.
- Cover the bananas with a thin cloth or mesh to protect them from insects and debris.
- Allow the bananas to dry in the sun for **2-3 days
Baking the Banana Chips
Now that you’ve prepared and sliced your bananas, it’s time to bake them into crispy and delicious banana chips. Baking is a popular method for making banana chips because it requires minimal effort and produces consistent results. So, let’s get started!
Preheat your oven to 200°F (93°C). The low temperature ensures that the bananas dry out slowly, resulting in crispy chips without burning them.
Place the sliced bananas on a baking sheet lined with parchment paper. Make sure to arrange them in a single layer, without overlapping, to ensure even drying. This allows the hot air to circulate around each slice, helping them to crisp up evenly.
Bake the banana slices for about 2-3 hours, or until they are golden brown and crispy. The exact baking time may vary depending on the thickness of your slices and the moisture content of the bananas. Keep a close eye on them during the last hour of baking to prevent them from overcooking.
Rotate the baking sheet halfway through the baking process. This helps to ensure that all the slices dry out evenly and prevents any uneven browning.
Once the banana chips are done, remove them from the oven and let them cool completely on the baking sheet. As they cool, they will continue to harden and become even crispier.
Store the banana chips in an airtight container to maintain their crunchiness. They can be stored at room temperature for up to a week, but I doubt they’ll last that long once you taste how delicious they are!
Baking the banana chips is a simple and fuss-free method that yields fantastic results. The low and slow baking process allows the bananas to dehydrate slowly, resulting in crispy chips with a delightful banana flavor. Plus, baking them at home gives you control over the ingredients, ensuring a healthier snack option compared to store-bought chips.

So, go ahead and enjoy your homemade banana chips. They are perfect for snacking on-the-go, adding to your breakfast cereal, or even as a topping for ice cream. Get creative and savor the natural sweetness and crunchiness of these delightful treats!
Seasoning and Flavor Options
Now that you know how to make your own delicious and healthy banana chips, let’s talk about how you can take them to the next level by adding some seasoning and flavor options.
1. Sweet and Salty: For a classic combination, sprinkle a little bit of sea salt and a touch of cinnamon over your banana chips. The sweetness of the bananas pairs perfectly with the savory salt and warm spice of the cinnamon.
2. Spicy Kick: If you’re a fan of spicy foods, try adding a pinch of cayenne pepper or chili powder to your banana chips. The heat will give them a little kick and add an exciting twist to your snacking experience.
3. Chocolate Lover’s Delight: For all the chocolate lovers out there, why not drizzle some melted dark chocolate over your banana chips? It’s a heavenly combination that will satisfy your sweet tooth and make your snack feel extra indulgent.

4. Tropical Paradise: Take your taste buds on a tropical journey by adding a sprinkle of shredded coconut and a squeeze of fresh lime juice to your banana chips. This combination will transport you to a sunny beach in no time.
5. Nutty Crunch: If you enjoy some added crunch, try tossing your banana chips with a handful of chopped nuts like almonds, walnuts, or pecans. It adds a nice texture and a boost of protein to your snack.
Remember, the seasoning and flavor options are endless! Get creative and experiment with different combinations to find your favorite. Don’t be afraid to try something new and exciting.
Enjoy your homemade banana chips with your preferred seasoning or flavor option. They make for a versatile and satisfying snack that can be enjoyed on-the-go, at home, or even added to your favorite recipes. So go ahead, grab a handful of these crispy delights and savor the natural sweetness of bananas in a whole new way.
Storing and Enjoying Your Banana Chips
Now that you’ve successfully made your homemade banana chips, it’s important to know how to store them properly to maintain their freshness and flavor. Here are some tips on how to store and enjoy your banana chips:
Storing Your Banana Chips
- Once your banana chips have cooled completely, transfer them to an airtight container or a resealable bag. This will help to keep them crispy and prevent them from becoming stale.
- It’s best to store your banana chips in a cool, dry place away from direct sunlight. Exposure to heat and light can cause them to lose their crunchiness and become soft.
- Avoid storing your banana chips in the refrigerator, as the moisture can make them go soft and lose their crispy texture.
- If stored properly, your banana chips can last for up to 2 weeks. However, they are so delicious and addictive that they probably won’t last that long!
Enjoying Your Banana Chips
- Banana chips make a perfect on-the-go snack. Pack them in your lunchbox or take them with you when you’re out and about. They are a great alternative to unhealthy processed snacks.
- Enjoy your banana chips on their own as a tasty and nutritious snack. They provide a good source of fiber and potassium, making them a healthier choice than traditional potato chips.
- Get creative with your banana chips by adding different flavors and seasonings. Sprinkle them with cinnamon and sugar for a sweet treat, or add a sprinkle of sea salt for a savory option. You can also try adding a touch of chili powder for a spicy kick.
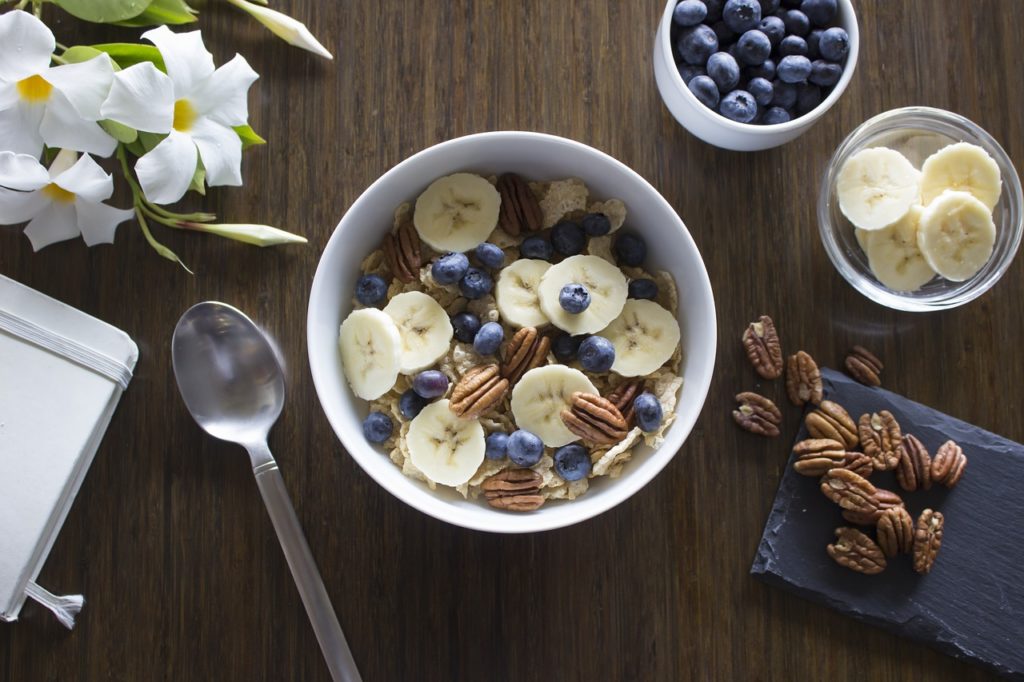
- Use your banana chips as a topping for yogurt, smoothie bowls, or ice cream. They add a delightful crunch and a hint of natural sweetness.
- Crush up your banana chips and use them as a coating for chicken or fish. It adds a unique twist to your favorite savory dishes.
- If you’re feeling adventurous, dip your banana chips in melted chocolate for a decadent and indulgent treat.
Conclusion

Now that you have all the information you need, it’s time to put your new recipe for homemade banana chips into action. With just a few simple steps, you can transform those overripe bananas into a delicious and nutritious snack. By making your own banana chips, you have the power to control the ingredients and create a healthier alternative to store-bought chips.
Not only are banana chips a great way to use up extra bananas, but they are also perfect for snacking on-the-go. Whether you prefer them sweet and salty, spicy, chocolatey, tropical, or nutty, there are endless possibilities for adding your own unique flavors and seasonings to your homemade chips.
By making banana chips, you are also doing your part to reduce food waste. Instead of letting those overripe bananas go to waste, you can turn them into a tasty treat that can be enjoyed for weeks to come. Just be sure to store your banana chips properly to maintain their freshness and flavor.
So why wait? Grab those brown-spotted bananas, slice them up, and pop them in the oven. In no time, you’ll have a batch of crispy, flavorful banana chips that you can enjoy anytime, anywhere. Happy snacking!


